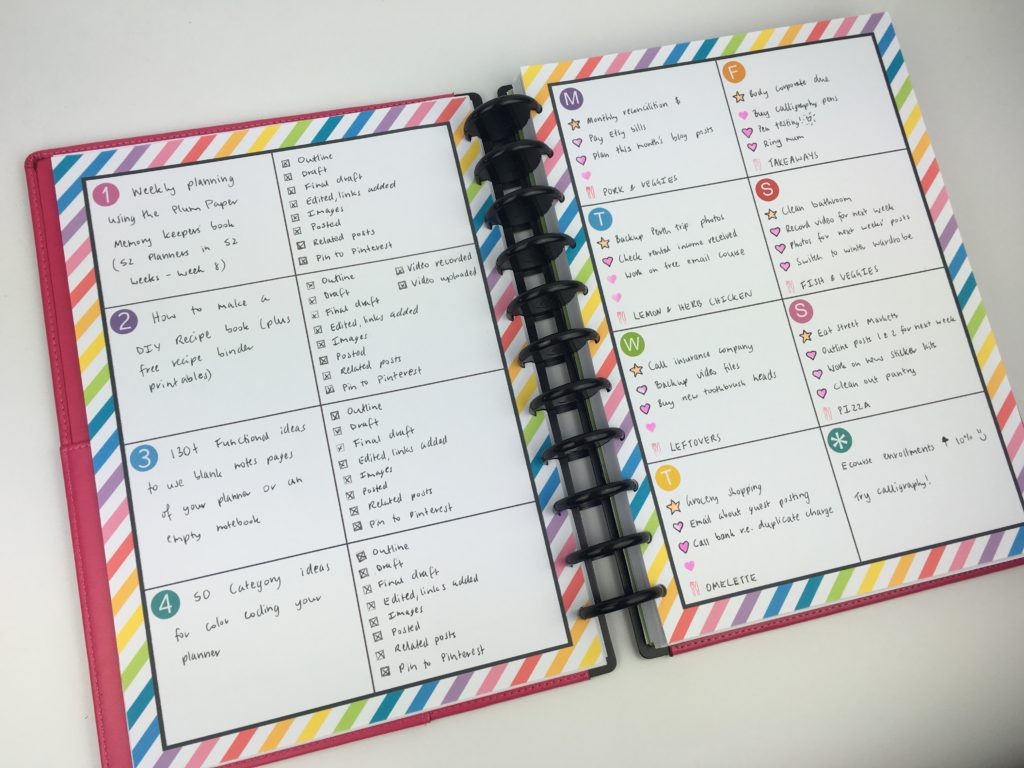
For week 18 of the 52 planners in 52 weeks challenge I opted to make a simple weekly planner with an open-ended flexible layout.
I printed 2 copies of the page – I shared the tutorial on how I made the weekly planner in Photoshop in this post.
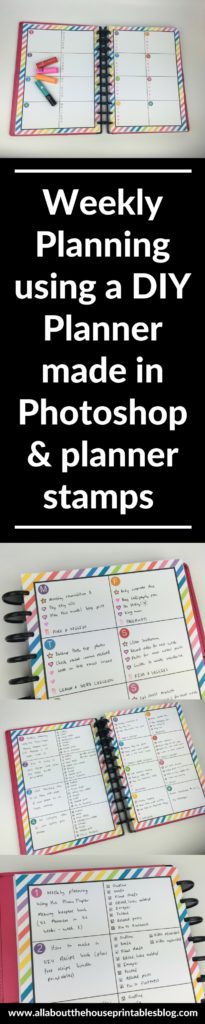
Using a simple planner with a flexible layout
One of the reasons I love really simple planners is that you can tweak them however you want. I opted to use 1 page for blog planning and the other for weekly planning. This layout would also be good for meal planning, categorised grocery list (1 store section per box), school etc.
Before the pen
I used my Arc full page size notebook.
Related: How to choose a binding system for your planner (comparison and which one I like the most)
I thought about printing the page at A5 / half page size but decided it would be too small with not enough room to write. I’d rather have too much planning space than not enough.
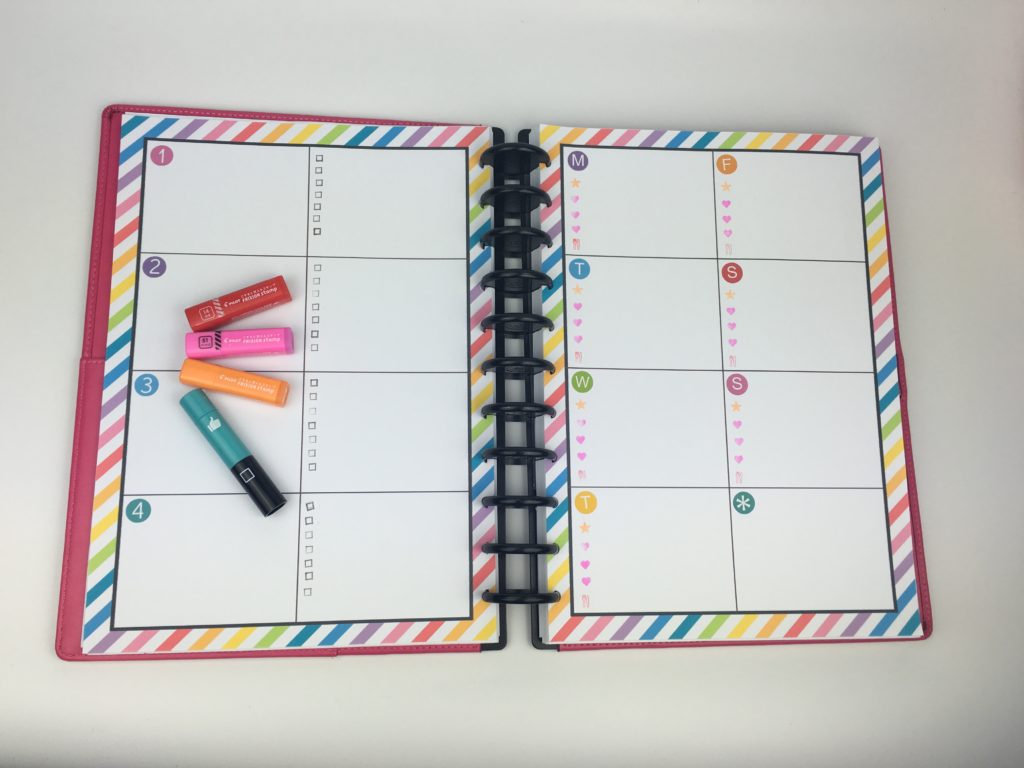
Setting up the spread
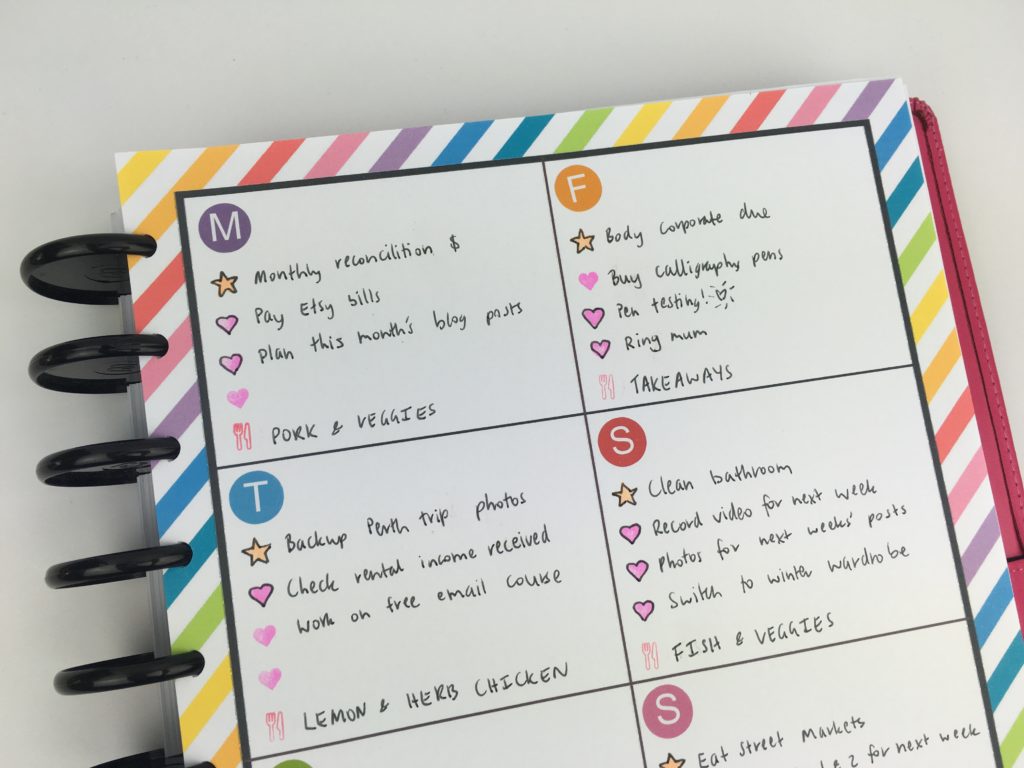
On the left side of the page:
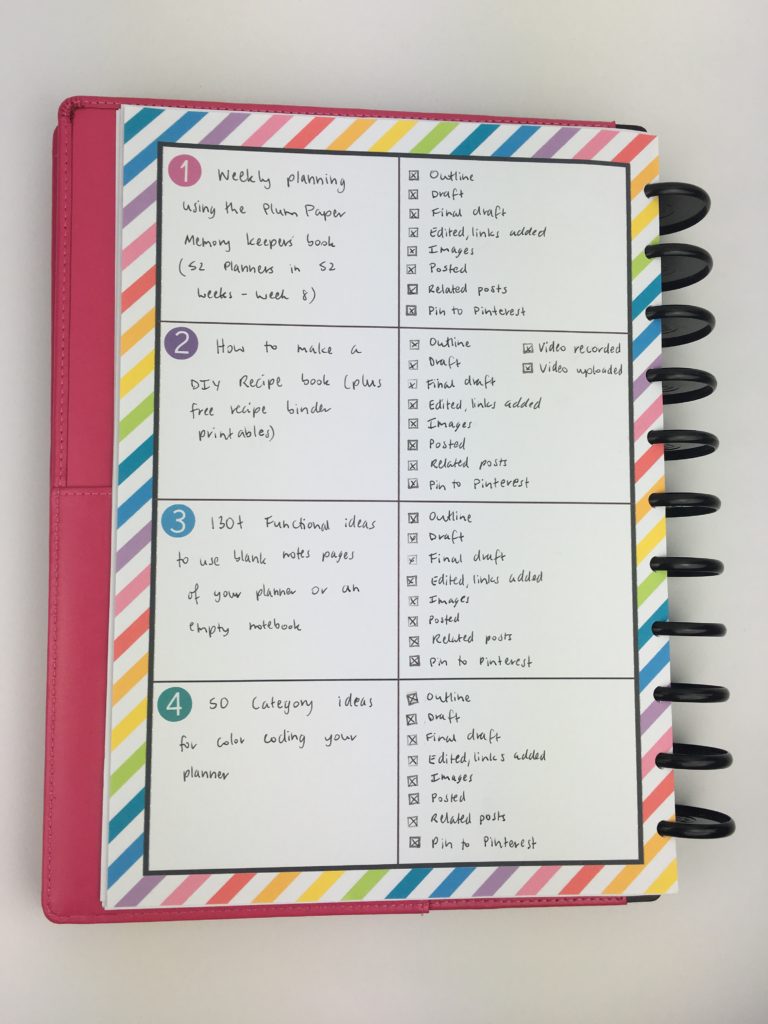
I planned the blog posts for the week. I do prefer planners with lines but using the stamps kept my messy hand-writing fairly straight!
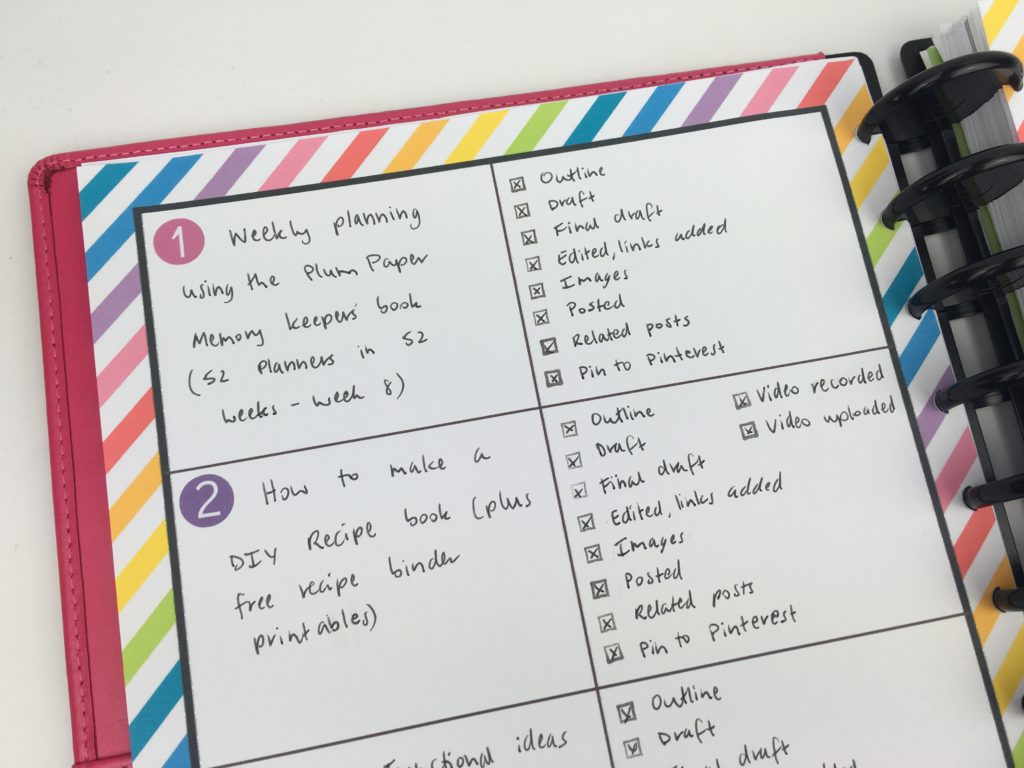
There was just enough room for all of the tasks for each post. If I were to use this layout again I’d pre-type in the tasks before printing to save time.
On the right side of page:
I used a star stamp to flag the most important task for the day.
And heart stamps for the rest.
With meal planning stamp for dinner plans.
Simple & Functional = <3
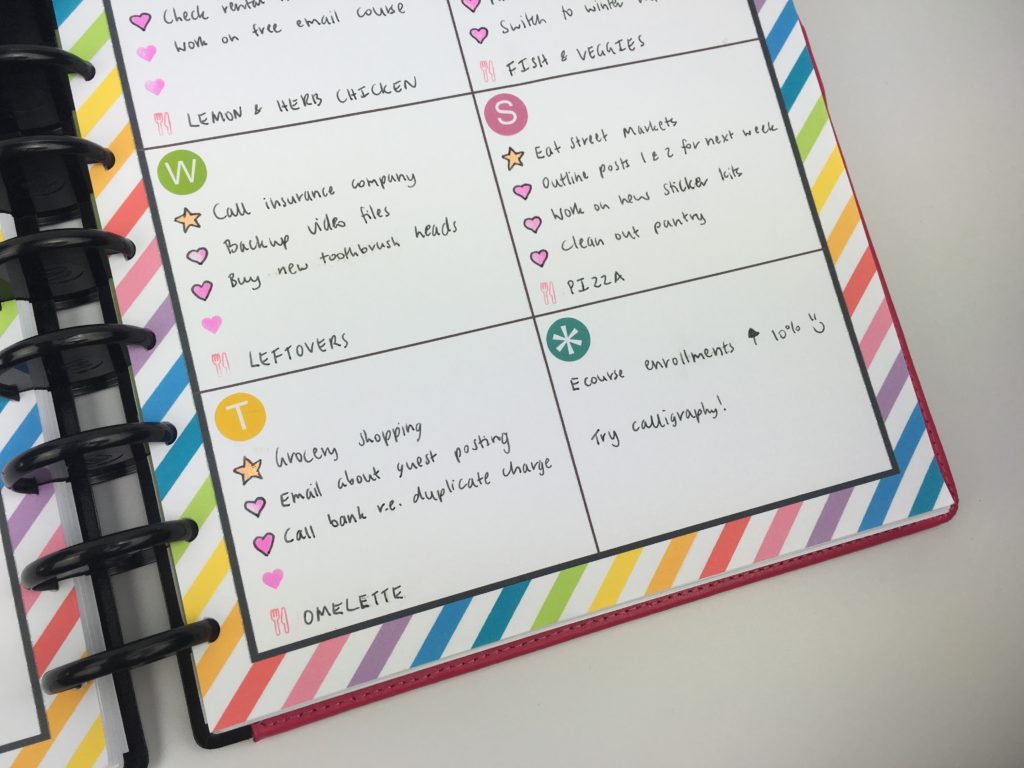
Since I decided to try something different and not use checkboxes for tasks, I drew an outline around the shapes when I’d finished that task.
I also wrote the meals in uppercase letters to make it stand out from the rest of the tasks for each day. If I used this layout again I’d use a red pen (or highlighter) to match the color of the meal planning stamp. Using different colors always makes things stand out more!
I could’ve fit more tasks in each day but I’m trying to keep my list to a to do list not a wish list and be a bit more realistic about how much I can get done.
I did end up having more tasks for Saturday and Sunday (when I have more time to do shop stuff) and used a sticky note to create extra room.
Stickers Used:
- Days of the week stickers (0.5″ diameter)
- Countdown / date dot / numbered stickers (0.5″ diameter)
I made these stickers in the same color as the rainbow stripe pattern I use for some of my printables (and am obsessed with) 🙂
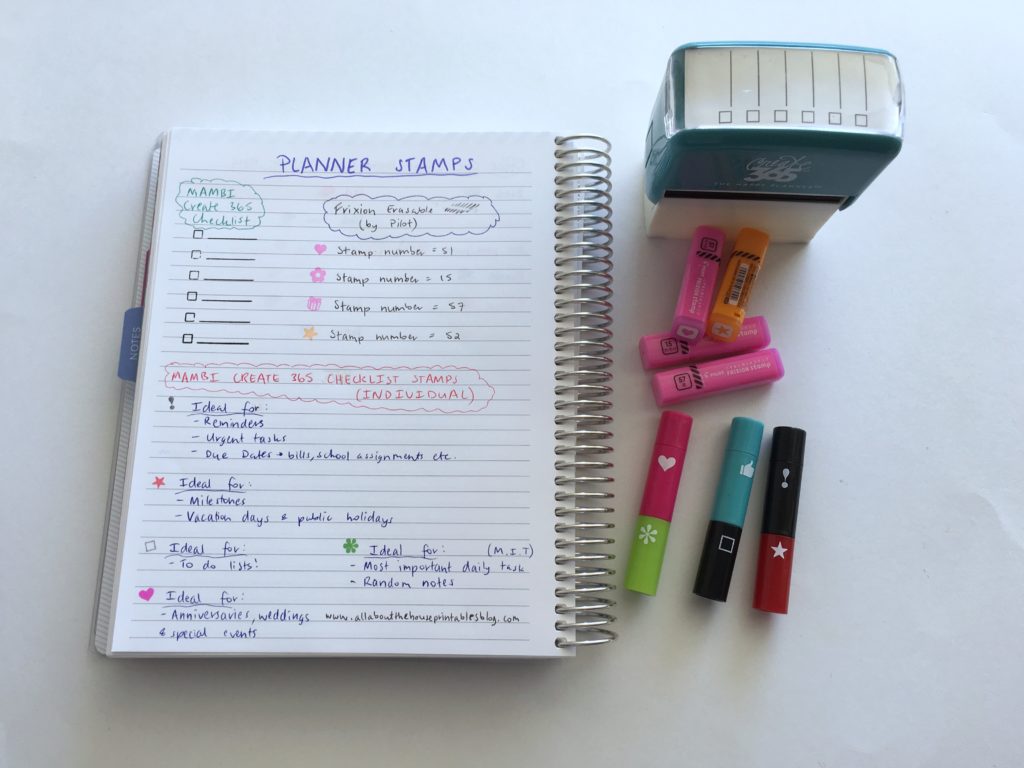
Stamps Used
I used the Frixion erasable self-inking stamps. Specifically:
- Heart (stamp code number 51)
- Star (stamp code number 52)
- Knife and fork (stamp code 14)
I purchased the stamps from Officeworks and Bunbougu (my favorite place for pens that are hard to find in Australia!)
I also used the MAMBI self inking checklist stamp (my favorite) which my sister stocks in her planner supplies shop.
Pens Used
I used my favorite pens: the Frixion erasable. They come in lots of colors but I opted not to color code this week, kept it simple and just used black.
Related: My all time favorite planner pens: Pilot Frixion Erasable Pens Review
Pros of this layout
- Simple, quick and easy to set up
- No pre-filled in categories so you could try different layouts each week
- It’s a printable so you can print it as many times as you like – you could use 1 page per week, 2 pages, 3 pages or more – it could also be used with other weekly layouts as well – very customisable!
Cons of this layout
- Sometimes planners that are very simple can be a bit ‘paralyzing’ if you don’t carefully plan out what you want to go where (sticky notes are great for pre-planning your week)
- The size of the boxes for the blog post title were bigger than they needed to be which wasted a bit of space
- No in-built habit tracker although you could draw one in the 8th box on the printable
- Saturday and Sunday have the same size planning space as the rest of the week. If you tend to get more done on weekends (like I do) you may not have enough room to plan everything
Would I use this layout again?
I really liked it and even though it was ‘DIY’ it was really quick to set up the week – all I needed to do was stick the stickers and stamp.
I had already used a similar layout blog planner from my printable blog planner kit and wanted to introduce that into the weekly spread, rather than just the title of the blog post or ‘post 1’ as I’ve been doing in past weeks. Having more detail for each post with each of the tasks broken down made it much more clearer to see what still needed to be done.
Related: How to organize your blog using a printable blog planner
The space to write the blog post title was a bit bigger than it needed to be – if I used the layout again I’d move the line so that the box on the left is smaller than the right (more like the horizontal Erin Condren Life Planner or Plum Paper horizontal planner)
I’d also tweak the right page so that the Saturday and Sunday sections were larger than the rest of the boxes so I could fit in everything.
I’ve also thought about adding a 3rd column to the left page for weekly meal planning and a habit tracker to create more daily planner space on the right side of the page.
So many options!
Like this layout and want to try it for yourself? Click here to download.
For printing tips and instructions on printing at half page size, 7 x 9″, Erin Condren size etc. see this post: Printing Tips
This insert would also go great laminated and added to your planner. I shared a tutorial on how to add pages to a spiral bound planner in this post: How to make a DIY Erin Condren Planner Cover for less than $2 (plus free printable cover)
Some ideas for using this planner:
- Categorised grocery list
- Weekly planner
- Weekly cleaning schedule
- As a future log for bullet journaling (i.e. 1 box for 1 month of the year)
- Goals / project planner with each sub-goal and it’s tasks allocated to a box
- Horizontal weekly spread with 2 boxes per day (e.g. personal and work, blog and personal, school and work etc.) and a meal planning and notes box
- Any other way you like!
Click here to download the weekly planner.
Click here to watch the tutorial on to make this planner in Photoshop.
Catch up on past week’s of the challenge:
- Week 13: Using a Kmart lists book to plan your week (planning by task, rather than by day)
- Week 14: Using a simple, 1 page weekly planner with only 3 sections
- Week 15: Trying a freehand weekly planner inspired by bullet journalling
- Week 16: Minimalist 1 page categorised planning using black pen & highlighters
- Week 17: Using the Plum Paper Vertical Weekly Planner
Liked this post? Pin it!
Leave a Reply