If you’re looking for a graphic design program you’ve probably heard of Canva and Photoshop.
Canva is a free online tool you can use to create Pinterest images, sales promotion images for your Etsy shop, Instagram pictures etc. It’s ideal for basic things but I wouldn’t recommend it for more advanced graphic design.
Photoshop is a paid software that you download and doesn’t require an internet connection to use. Most people are intimidated by Photoshop and it has a reputation for being complicated to use (I know I thought so when I first started using it!). However, once you get the hang of it, figure out which tools you actually need (I only use around 10% of them) and forget the rest, then Photoshop is quite easy to use.
This post contains affiliate links. If you make a purchase after clicking one of these links I’ll receive a small commission (at no extra cost to you) in exchange for referring you.
I use Photoshop for many things including:
- Making printables
- Printable labels
- Seamless repeating patterns
- Party banners / bunting
- Etsy shop banners & profile pictures (see this post on how to make an Etsy shop banner and this post if you want to learn how to make an Etsy shop profile pcicture/logo)
- Catalogues (see this post for a step-by-step tutorial on how to make one)
- Collage board/product collage – these are great for gift guides (for your online shop or if you’re a blogger), promoting other products from your shop if you have spare photos for your Etsy shop, mood boards, inspiration boards etc. (See this post for a step-by-step tutorial on how I use collage boards)
Related: 50 Things you can make using Photoshop
So if I have Photoshop and can do all of those things, then why do I still use Canva?
Surely a paid software is better than a free online tool right?
Not necessarily, I use each program for different things. I use Canva for creating blog post images and Photoshop for the rest of my graphic design projects.
I initially set up my blog picture templates using Photoshop, but it took a long time to load and the files would become quite large. I’d also save the images at quality number 12 (the highest you can), and I’d continue to get an error in WordPress saying the images were too large to upload.
Canva must use a lower image quality resolution by default, because I can download the exact same image and upload it to my blog with no problems at all. Yes I could save the Photshop file at a lower image quality, but even then it would still say the file size was too large. Eventually, I got sick of compressing images (I used Compress JPG if you were wondering), and set up the same image templates in Canva.
Some of the main reasons I like Canva:
- Canva is quick – it’s faster to load an image in Canva that it takes my computer to load a Photoshop file
- Doesn’t slow down my computer while using it. Photoshop is a large software program – hence everything will take longer to load on your computer (which is why I recommend getting as much RAM as you can – my laptop is 16GB RAM – or purchasing a laptop with an SSD drive)
- Can share access to your designs with other people – so if you have a virtual assistant you can give them access to your Canva account and they can make your blog graphics and promotional images for you
- Pre made templates – there are many pre-made template for everything from making gift cards if you sell on Etsy, to blog post images, letterheads, ebook covers, Facebook covers etc.!
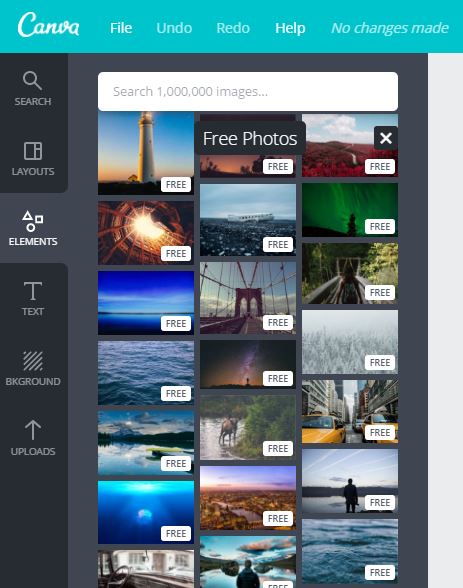
- Free stock photos. I use the same image template for all my blog post that looks like this:
Related: How I make my blog graphics (for Pinterest)
But if you prefer to use stock photos, they have plenty for free, and some that can be purchased for just $1. There are hundreds of stock photo websites (I did a roundup of 100 free and paid stock photo websites in this post), which can sometimes get overwhelming. Having stock photos to choose from directly within the Canva makes the design process quicker.
- Canva stores your templates for you online. No need to worry about using up space on your hard-drive – Canva keeps them all right there for you whenever you’re ready to come back and use them again
- Photoshop is a powerful software and can do many things. Canva can only do limited things but there is some overlap between what both programs can do. For blog graphics I can use Photoshop or Canva. Canva loads faster, so it makes sense for me to use Canva for creating blog post images.
I use Canva for some things, however, it could never completely replace Photoshop. Here are the main reasons why:
Things photoshop can do that Canva can’t
- Can use the Photoshop offline – no need for an Internet connection – once you download Photoshop you can use it anytime
- Can store templates and files on your own computer so you know that they’re truly yours. The templates you create using Canva are housed on Canva’s website
- With Photoshop you can make repeating patterns
- If you want to use the same template and tweak the colors, you can store these in the layers menu in Photoshop and hide the layers (click the eye icon). It’s easier to compare different color-ways and sizes within the 1 template. To do this in Canva you’d need to create multiple copies, choose your color-ways for each and then flick back and forth between the tabs or take a screenshot to compare the difference designs
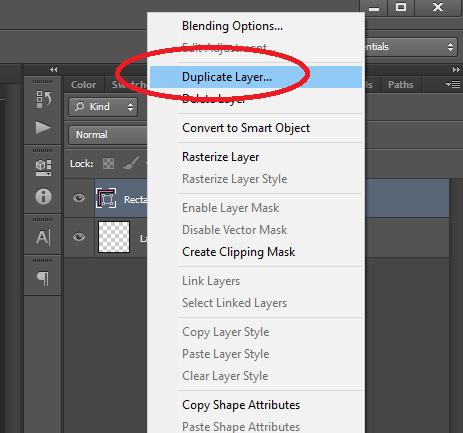
- Duplicate layers between templates. You can’t copy design elements between different templates on Canva but you can in Photoshop. To do this, right click the layer you want to copy, select ‘duplicate’ then choose the template you want to copy it to
Overall, Photoshop is a graphic design program whereas Canva is mainly just an image editing program.
I would never use Canva for paid products such as printables, as I don’t think the image quality is as good as Photoshop.
I did a detailed comparison of Canva versus Photoshop in this post.
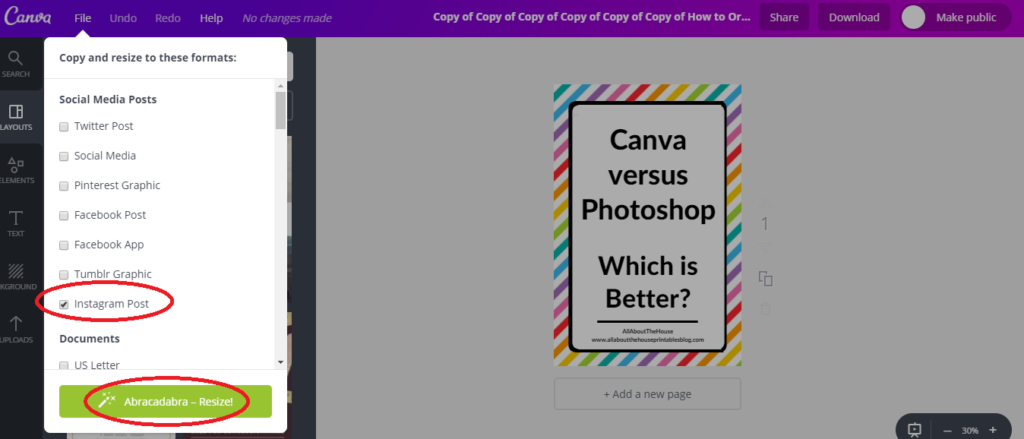
Is canvas paid plan worth it?
Canva’s paid plan gives you the ‘magic resize’ function. It’s the only reason I use their paid plan.
With this button you can take a design you’ve already created, click a button to change the size to one of their pre-made templates e.g. If you’d created an Instagram post image and wanted to tweak it to suit your Facebook page, or change it’s dimensions to a custom size of your choice.
Magic resize tool
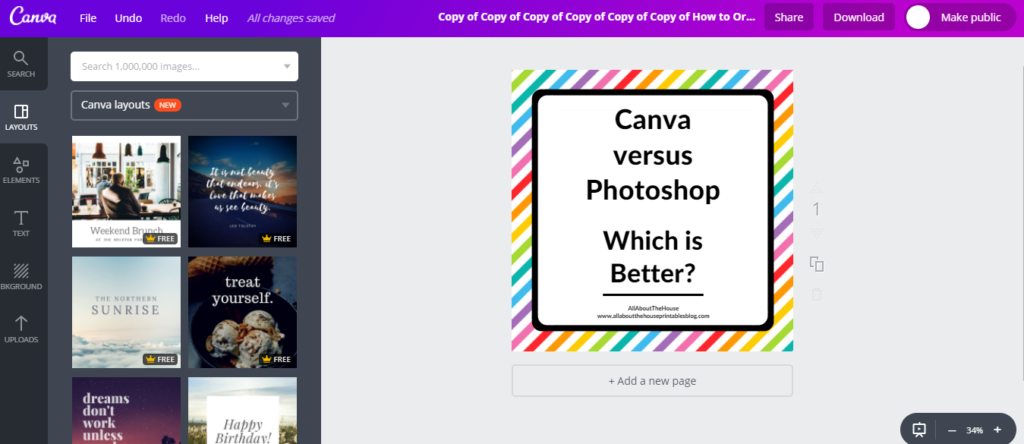
I can make a design at once size then click a button change the dimensions and it’ll automatically resize while maintaining the proportions of the design and without distorting text etc.
You can resize using Photoshop but it takes longer (if you did want to do this, left click press the shift key and click the bottom layer of your design in the layers menu, then press CtRL and t on your keyboard left click and drag your mouse onwards or outwards). If you enlarge in Photoshop it can sometimes blur the image and reduce the quality. I’ve resized a small design to a larger size in Canva and there’s been no reduction in image file quality.
To use the magic resize tool
- Create your design
- Go to file > magic resize
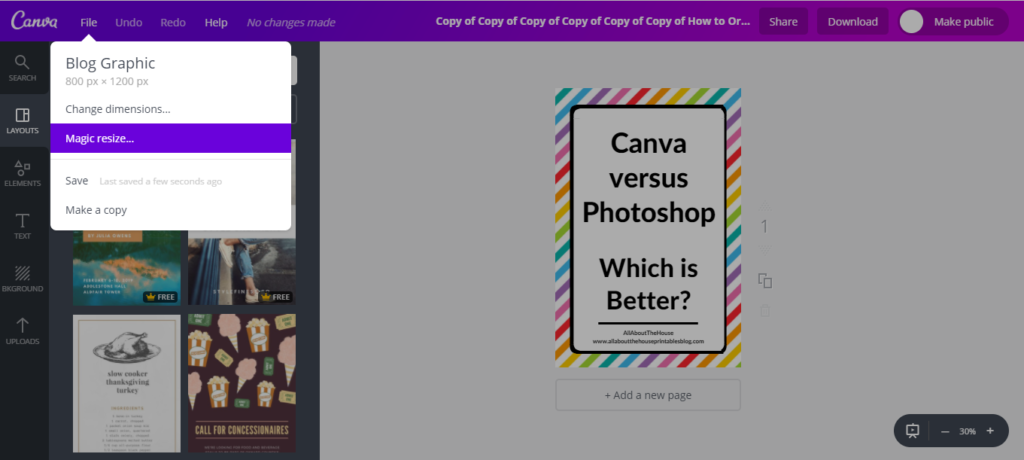
Tick the size you want to use from Canva’s templates pre-sized for Instagram Posts, Etsy shop banners etc., or, to choose your own dimensions go to ‘change dimensions’ (at the top of the menu)
The program isn’t perfect and you do need to tweak the design elements to suit the new size, but it’s quicker than re-creating the design each time from scratch.
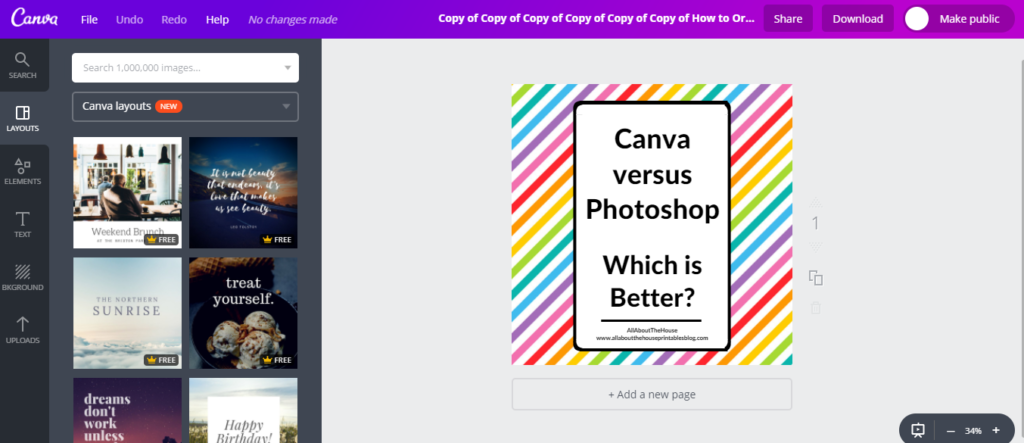
Some quick tweaks and it’s ready to post!
Canva offers a free 30 day trial of their paid plan if you want to try it out first.
Want to try out each software?
Some tutorials on Canva
- How to make business cards for free
- How I make my blog graphics (for Pinterest)
- How to make a monogram desktop wallpaper – you can also download the wallpaper from the free printables library which you can gain access to when you subscribe to the blog
- How to make printable labels for FREE (using Canva)
- How to add your own text to printable labels (plus FREE printable cleaning labels!)
- How to make a personalised screensaver/computer or laptop wallpaper/desktop background
Photoshop Tutorials
If you don’t have Photoshop, you can purchase and download it here (my affiliate link).
Some of the tutorials I’ve posted on how to use Photoshop:
- How to create a new file in Photoshop and how to resize (without distorting!)
- How to use the color tools in Photoshop
- How to color match anything in Photoshop (step by step tutorial)
- Photoshop for beginners: How to use the rotate tool in Photoshop
- How to make a planner bookmark (DIY Page Markers Tutorial)
- How to change the colors of a pattern overlay in Photoshop
- How to make a stripe pattern in Photoshop (video tutorial)
Related Posts:
- Picmonkey versus Canva versus Photoshop versus Adobe Illustrator: Which one is best for graphic design?
- How to download and install custom fonts on your computer
- How to keep track of blog post ideas on your phone (no paid app required)
- How to set up ConvertKit and how to make a subscriber opt in image video tutorial
- How to write and publish a blog post in 1 hour (plus a free printable blog post workflow checklist)
This is not a sponsored post. I am not affiliated with either of these products.
Good Read! I love Canva and have thought about getting photoshop so this was right up my alley
yes canva is awesome
Great information! I am one of those intimidated by Photoshop and sometimes use Canva but primarily PicMonkey. I’ll have to utilize Canva’s features more often 🙂