I’ve had a few people ask me how to use the swatches menu in Photoshop because theirs isn’t showing all the pretty colors you can see in my other video tutorials! So in this post I’m showing you how you can get all those pretty colors too 🙂

This post contains affiliate links. If you make a purchase after clicking one of these links I’ll receive a small commission (at no extra cost to you) in exchange for referring you.
Photoshop Swatches Menu
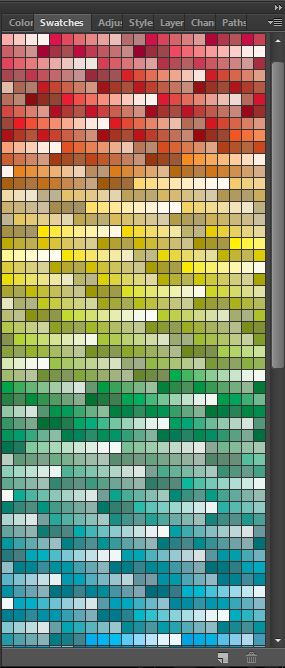
Photsohop’s swatches menu is a brilliant tool – it automatically provides you with color schemes and is my go to resource when creating an ombre color scheme (different shades of the same color), like this wavy pattern:

I show how to make this wavy pattern and apply the colors to the different wave sin my ecourse: How to Create Patterns in Photoshop and Monetize Your Designs (along with a ton of other pattern tutorials such as chevron, polka dots, stripes, gingham, checkerboard, random/tossed repeats, directional prints etc. – there’s over 80 video tutorials!)
Photoshop’s swatches menu is also great if you want to create rainbow color schemes, can’t decide on colors or want to create a new color collection and need some inspiration on what colors to pair together.
If you don’t have Photoshop, you can purchase and download it here (my affiliate link).
Related: My 5 Favorite Color Tools for Graphic Design
How to Use Photoshop’s Color Swatches Menu
You can either watch the video or I’ve summarized the steps into written instructions below:
To enlarge the screen of the video, click the square icon in the bottom right hand corner of the video (it will say ‘full screen’ when you hover your mouse over the icon).
Subscribe to my YouTube channel for more planner related videos & graphic design tutorials!
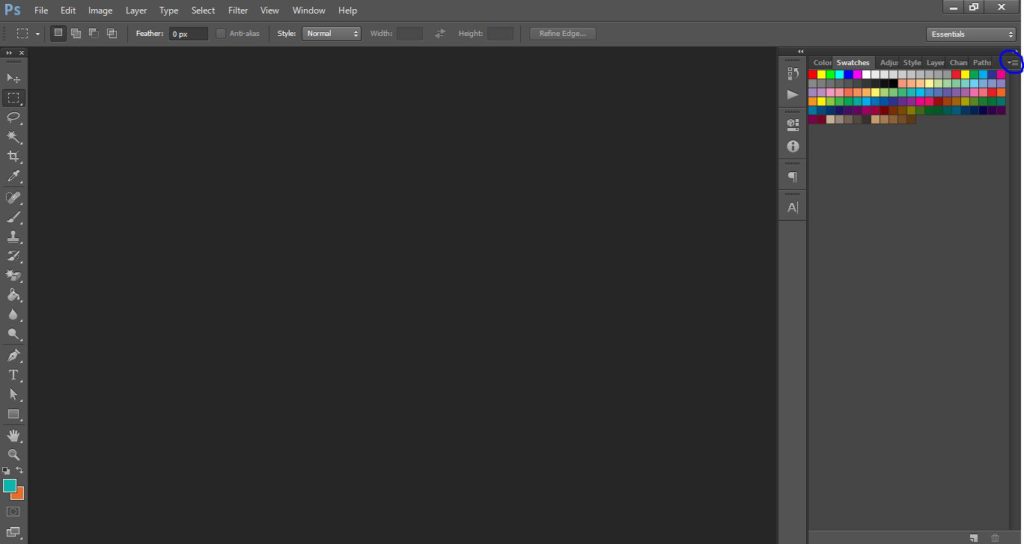
- When you open up Photoshop, this is probably what you’ll see (I’m using version CS6 but you’re will probably be similar no matter what version you’re using):
To open the swatches menu in Photoshop go to ‘Window’ (at the top menu of Photoshop) then choose ‘swatches’ from the drop-down menu.
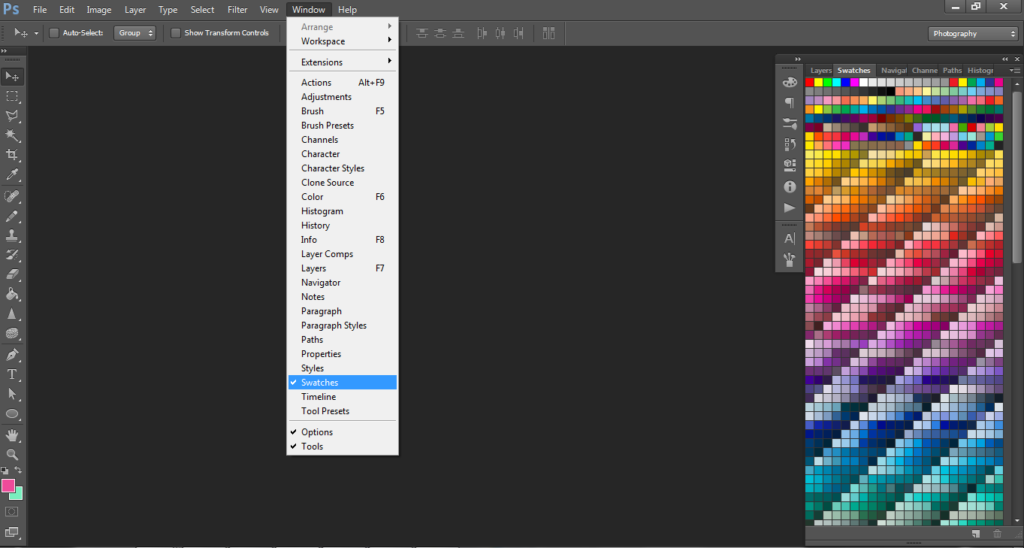
2. Click the swatches tab on the right and then click the arrow pointing downwards (on the very right of your screen). From this menu you can choose a color swatch.
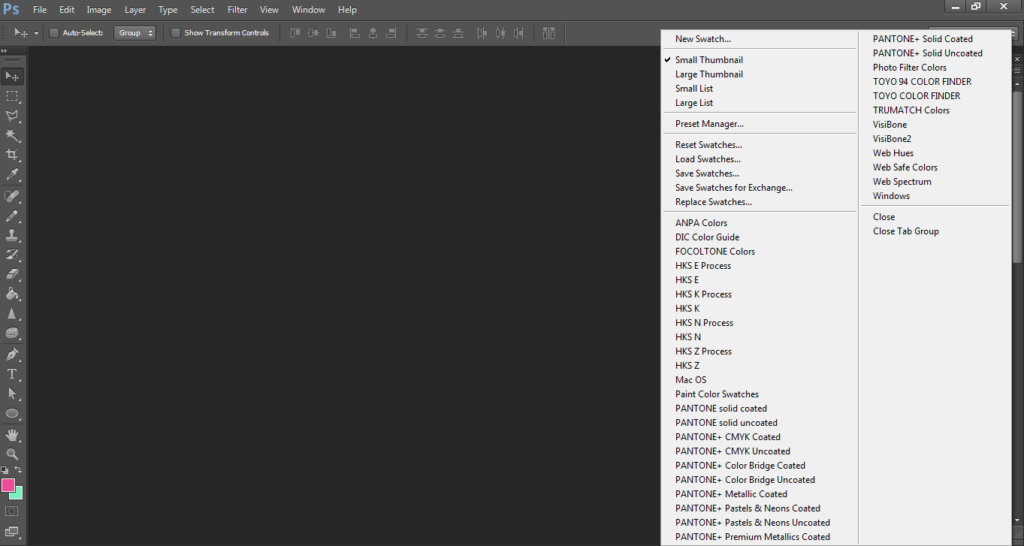
3. Click on the color collection swatch you want to choose, this menu will appear:
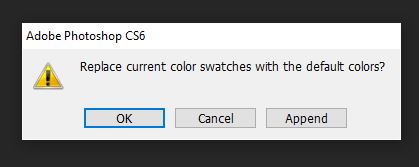 Choose ‘append’
Append in Photoshop means ADD to the bottom. So if you already have colors in your swatches menu, choosing APPEND will ADD the colors below the ones you already have.
Which color swatches do I recommend?
My favorite color swatches (and the ones I regularly use in my ecourse: How to Create Patterns in Photoshop and Monetize Your Designs is the ‘PANTONE SOLID COATED’ color scheme (it’s the one on the top right on the right menu in the above photo)

Some of my other favorite colors swatches are:
‘TRUMATCH COLORS’
A good mixture of light and dark shades of each color:
‘TOYO 94 COLOR FINDER’
This ones great for rainbow colors schemes! It’s actually harder than you think to create a really nice rainbow color scheme. In fact, creating a color scheme that comprises more than 3 colors is quite difficult – and that’s why I love Photoshop’s swatches menus – all the hard work is already done for you 🙂 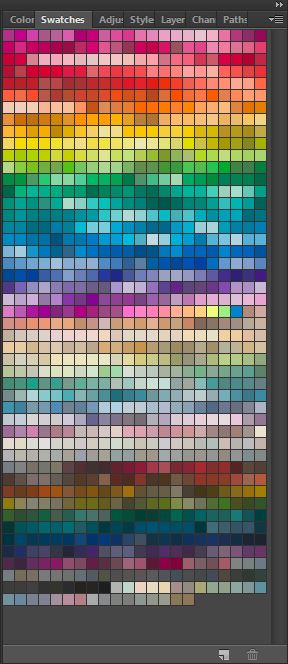
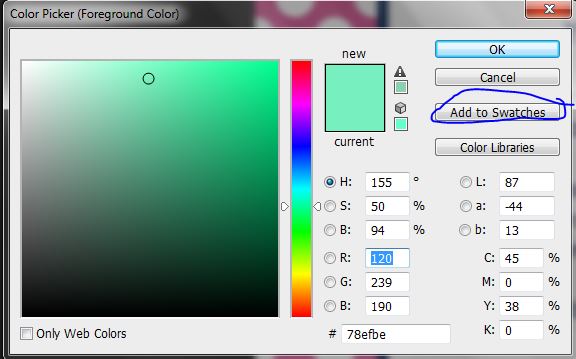
Adding a color to the swatches menu
When you find a color you like in the color picker just click ‘add to swatches’ and it’l be added to the bottom of the swatches menu. I recommend naming your swatches by giving them a number reference e.g. ‘1’ or ‘blue 1’ for a light shade of blue, ‘blue 5’ for a dark shade of blue, by color collection e.g. ‘summer 2016 range’ etc. If you hover your mouse over a swatch it’ll tell you the name of the swatch (very handy when you have a lot of swatches saved!)
The color Libraries Tool
The color libraries tool is another one of my favorite tools for creating ombre color schemes (different shades of the same color e.g. light to dark).
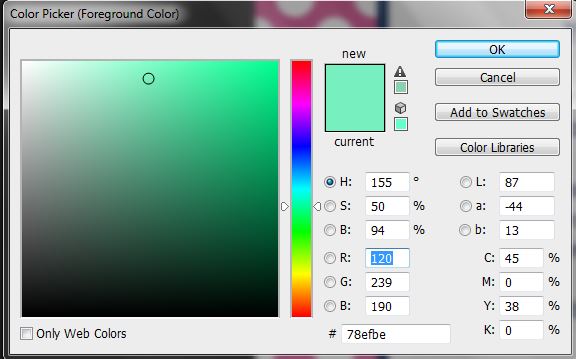
When you find a color you like in the color picker just click ‘color libraries’ (underneath the ‘add to swatches’ button)
That will bring up this menu:
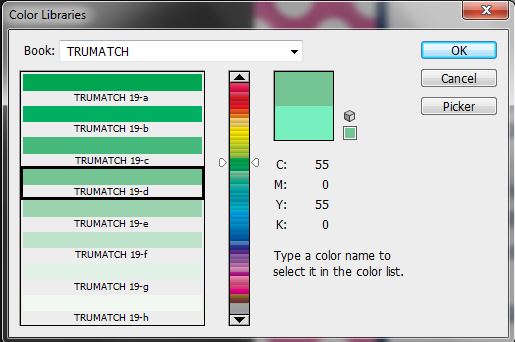
You can change the color library by clicking the arrow pointing down beside ‘book’ e.g. you could change it to TOYO 94 or PANTONE SOLID COATED (my favorite swatches as mentioned/shown above)
Want to experiment with colors?

If you’re not sure how to use an overlay see: How to change the colors of an overlay in Photoshop and What is the difference between a digital paper, pattern overlay and Photoshop .PAT file?
Related: FREE printable stripes digital paper
How to back up color swatches
When you start adding a lot of swatches the your swatches menu, make sure you back them up (just like you should back up your pattern library!) If you want to reset the swatches back to Photoshop’s defaults, make sure you SAVE the swatches BEFORE resetting.
Click the ‘save swatches’ button (it’s on the left side of the menu below)
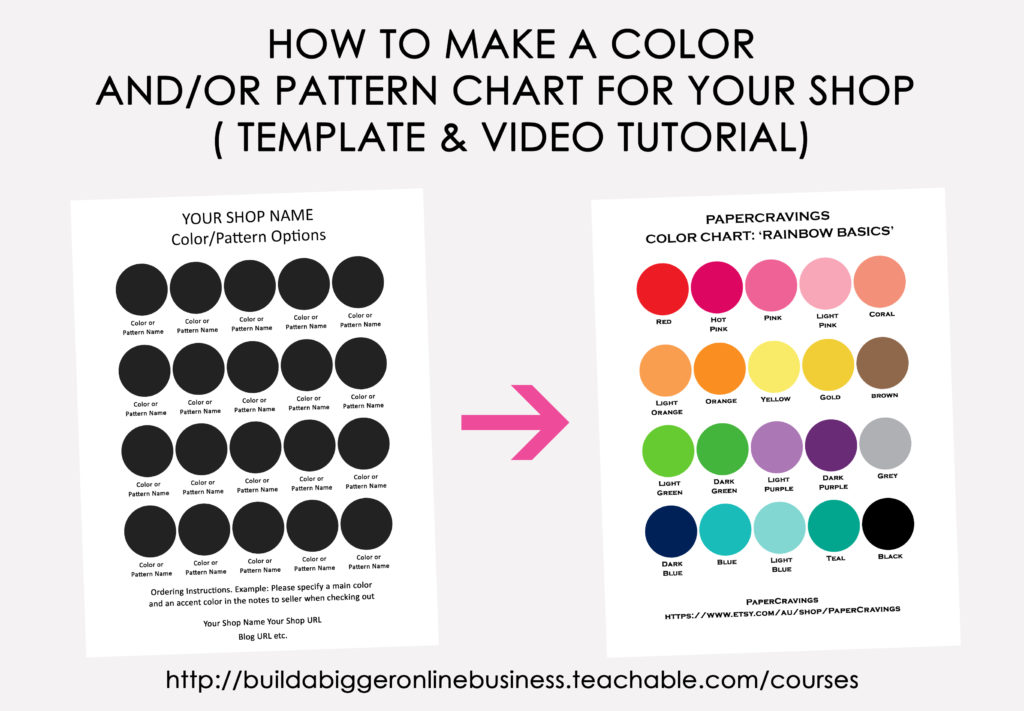
How to make a color chart
If you have an online business, once you’ve chosen your color swatches, you’re going to want to create a color chart so customers can view all of the available colors to choose from when ordering products from you. When I started my printables shop, I searched high and low for a template I could quickly customise so I could get back to designing printables. I wasted far more time than I’d like to admit, trawling the internet and couldn’t find any template of the sort 🙁 So in my usual fashion, I made my own. If you need an easy to use and fully customisable template (you can even use it for 2 color, 3 color etc. color combinations!), I have one you can download here (also includes step-by-step video tutorial on how to add your own colors to the chart template)
Want more tutorials on how to use Photoshop? Check out the FREE graphic design video tutorials library!

Leave a Reply