A question I get asked all. the. time. is whether my printables can be printed at Happy Planner size. The answer is.. yes!
You can use this same method to print pages at Erin Condren page size, PlumPaper, Limelife Planner, personal size or any other size you like!
To enlarge the screen of the video, click the square icon in the bottom right hand corner of the video (it will say ‘full screen’ when you hover your mouse over the icon).
For more planner related videos, subscribe to my YouTube channel
How to print printables at MAMBI Happy Planner size
-
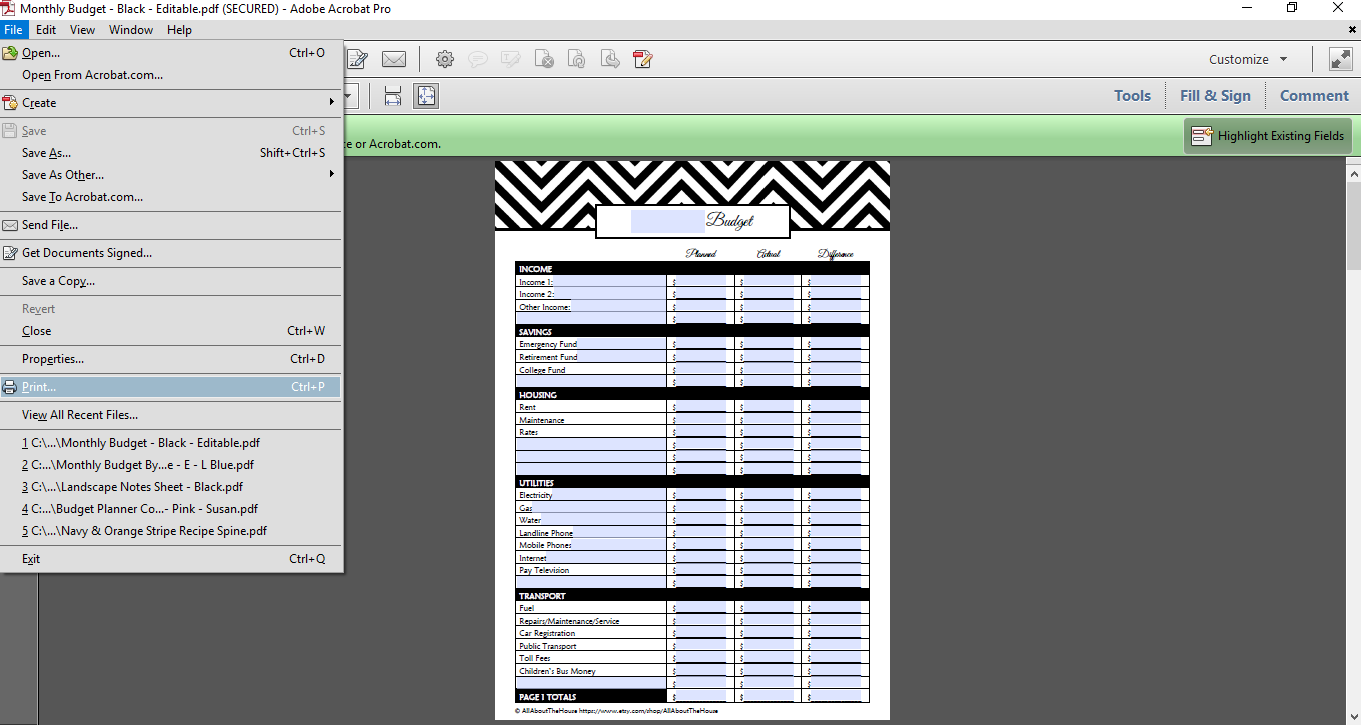
Open up the PDF file you want to print
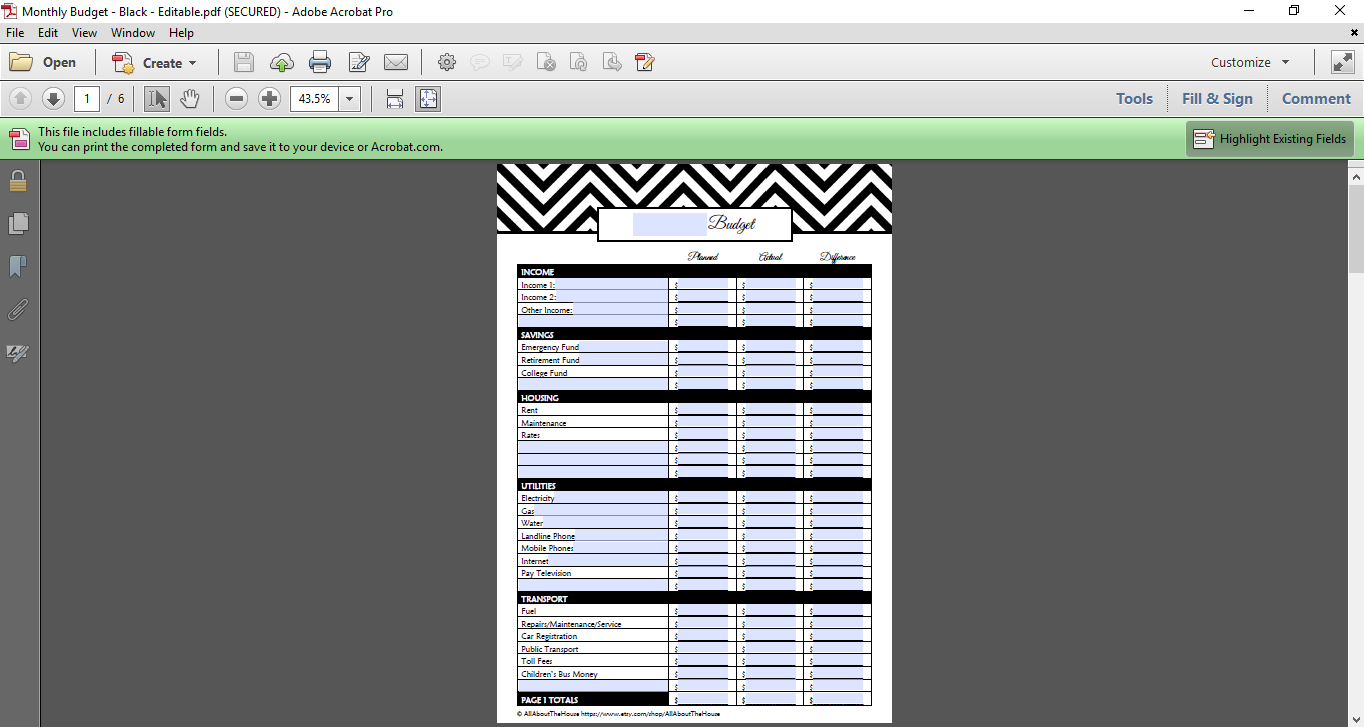
The monthly budget printable I’m going to use for this tutorial is from my budget planner printable kit which you can read more about here.
Want to download a free printable to try out this tutorial? Click here to access the free printables library.

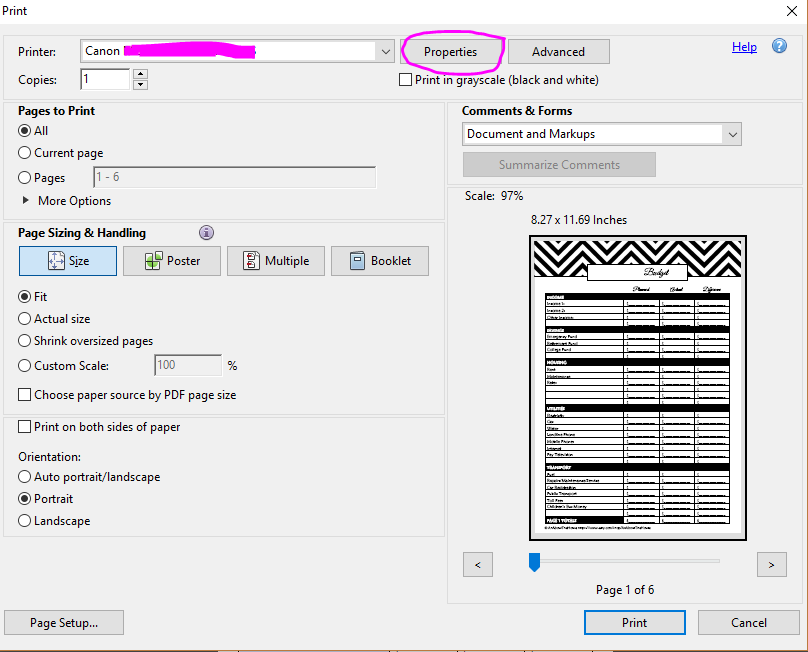
2. Go to file > print
3. Choose your printer and select ‘properties’
I am using a Canon printer – your printer menu may look a little different depending on what printer brand you’re using (your printer menu may say ‘advanced’ instead of properties)
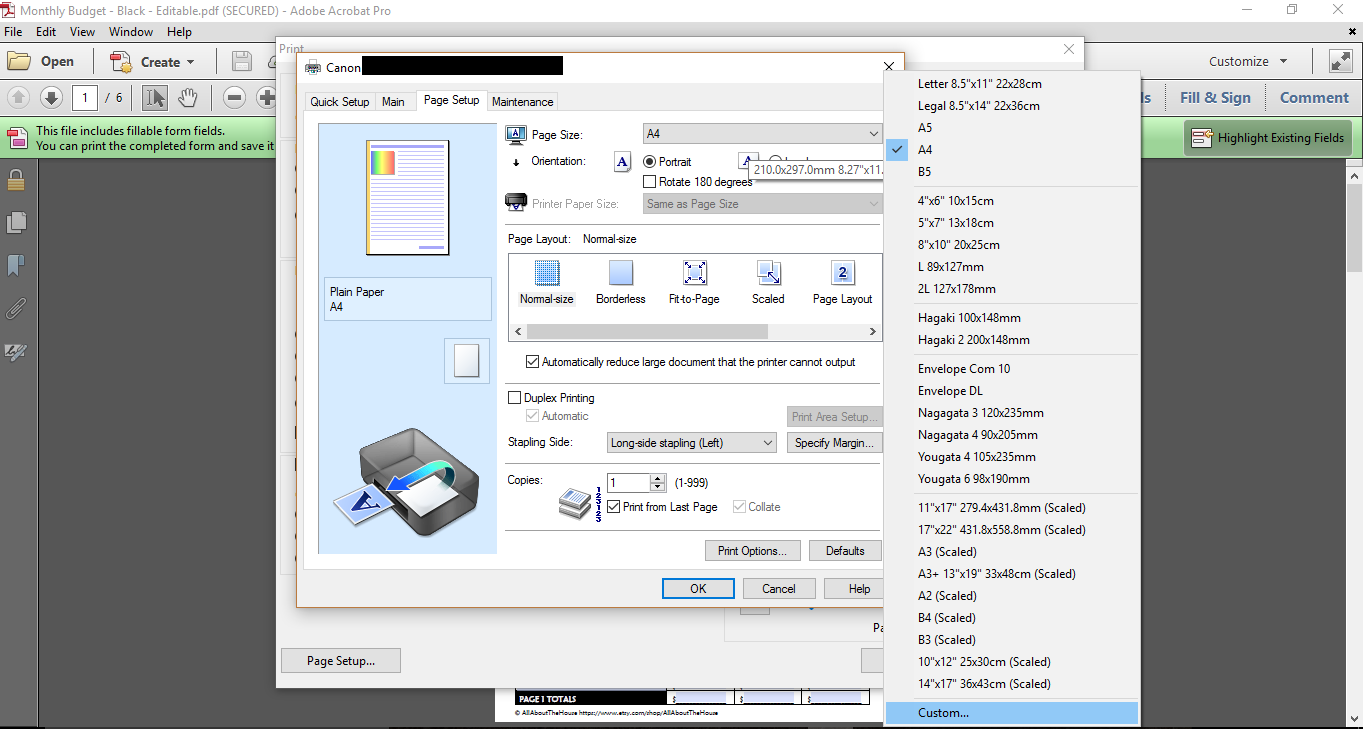
4. Go to > Page Setup > Custom
Related: 7 Ways to make colors POP when printing using an Inkjet printer
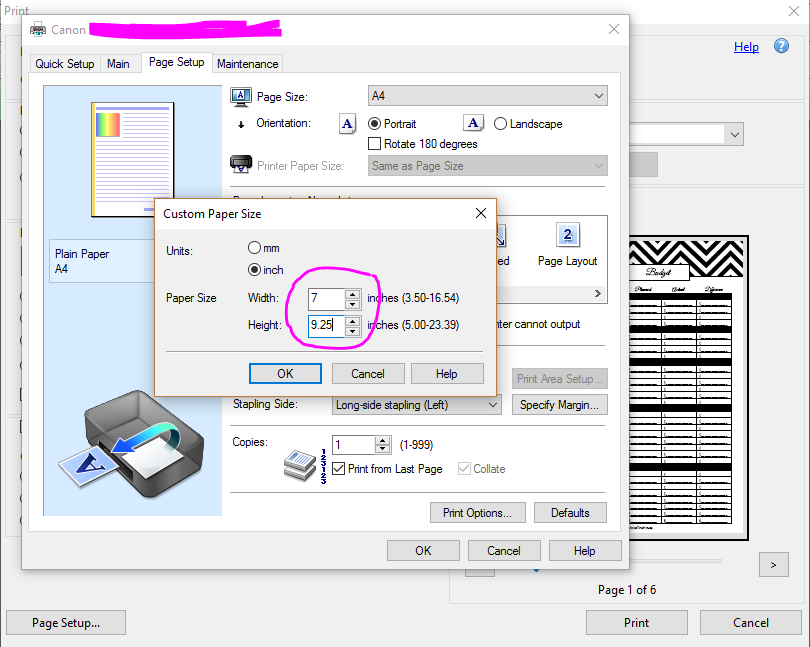
5. Enter the dimensions of the size/type of Happy Planner you are using
Enter the dimensions of the planner, then select OK to return to the main printer menu
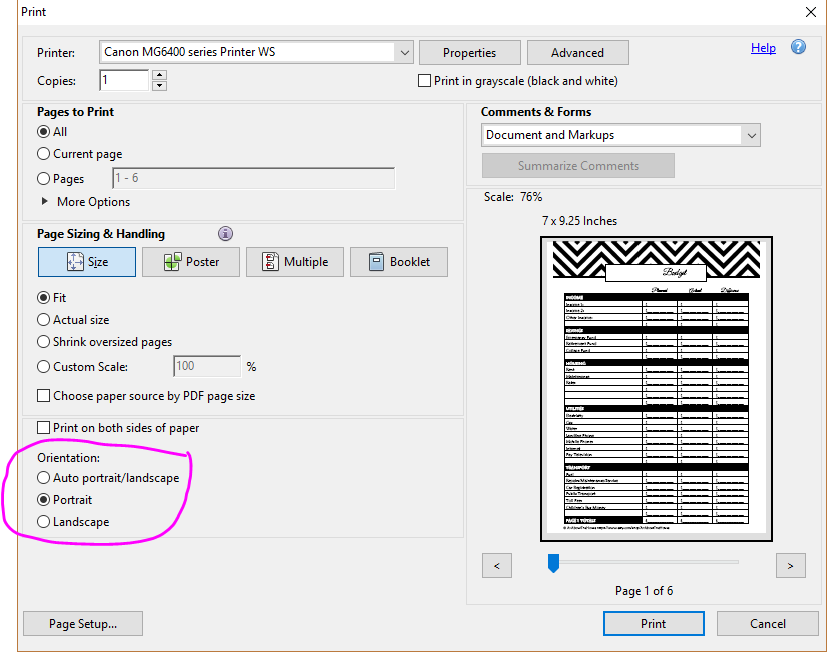
Classic pages are 7″ wide x 9.25″
The Mini Happy Planner’s pages are 11.7cm wide x 17.8cm high
6. Back in the main printer menu, make sure ‘fit’ to page is selected
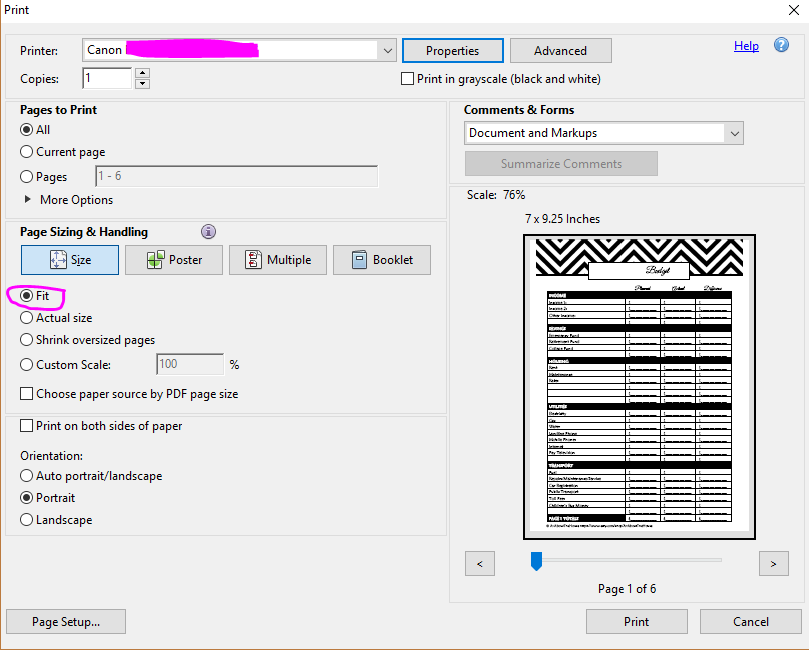
If you’re find stuff is getting cut off, it’s probably because you still have ‘actual size’ selected:
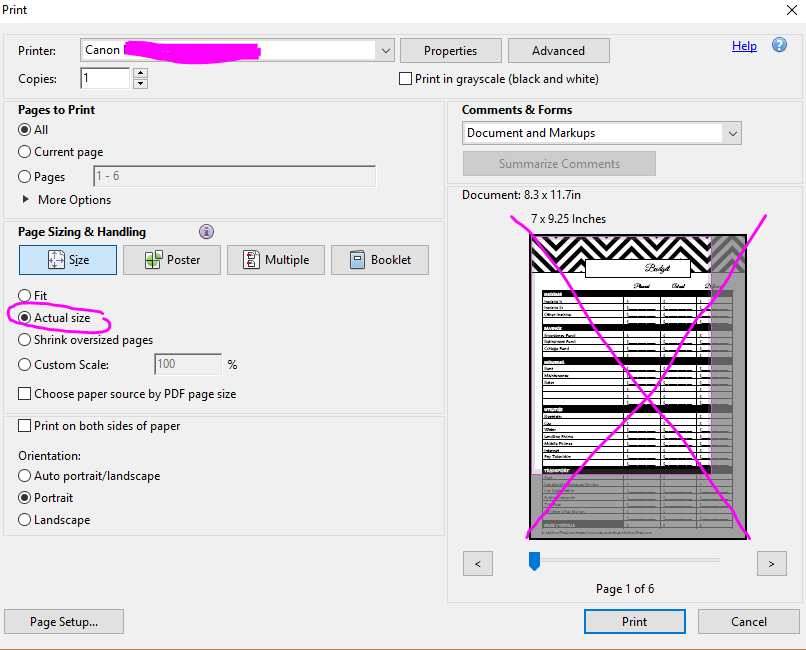
Change from ‘Actual size’ to ‘fit’
You’ll also want to make sure that you have the correct page orientation. Most printers will automatically detect what the correct page orientation is, if not be sure to check/select the correct page orientation before printing
Once you’ve selected the above settings, you’re ready to hit the print button.
Step 7. Trim the pages
Now all that’s left is to cut the pages using a paper guillotine or paper trimmer, punch and add to your planner. If you’re going to be adding a lot of pages, I recommend cutting them all in one go (a stack of 5 works well) – I use and recommend a paper guillotine.
If you’re looking for a Happy Planner, my sister stocks them in her shop, Carefully Crafted (as well as a lot of the Happy Planner accessories).
The printables featured in this tutorial are from the budget planner which can be purchased from my shop.
If you don’t have the Happy Planner punch most discbound punches spacing is compatible. I don’t have the Happy Planner punch and instead used my ARC punch. I did a guide to discbound systems in this post.
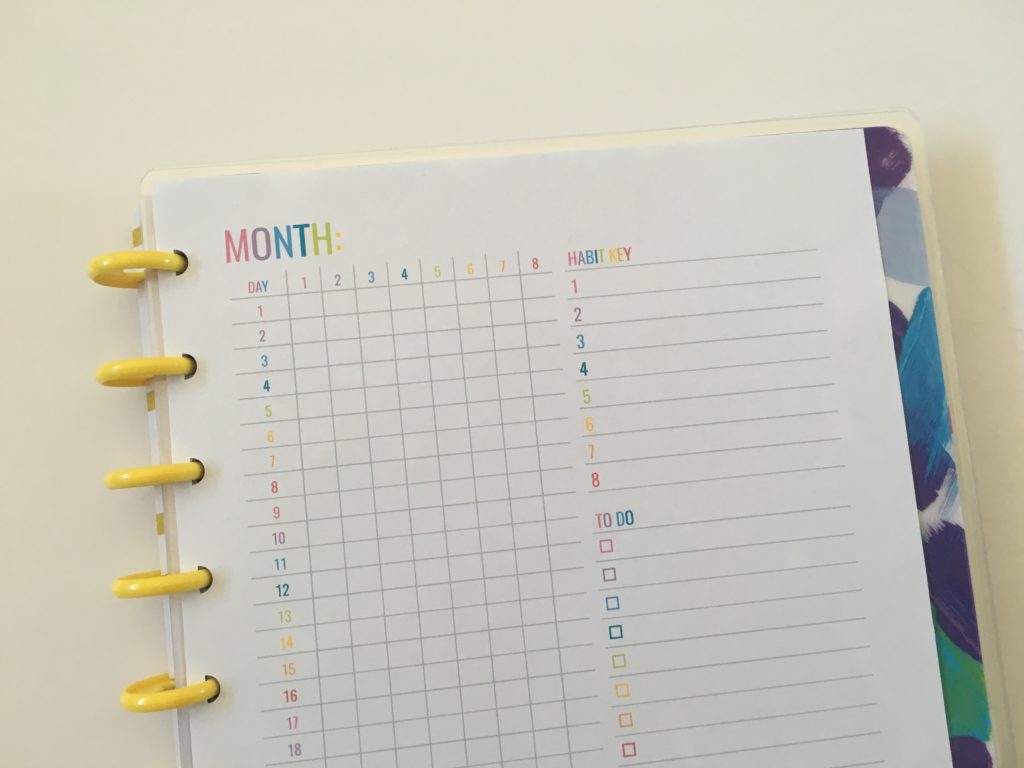
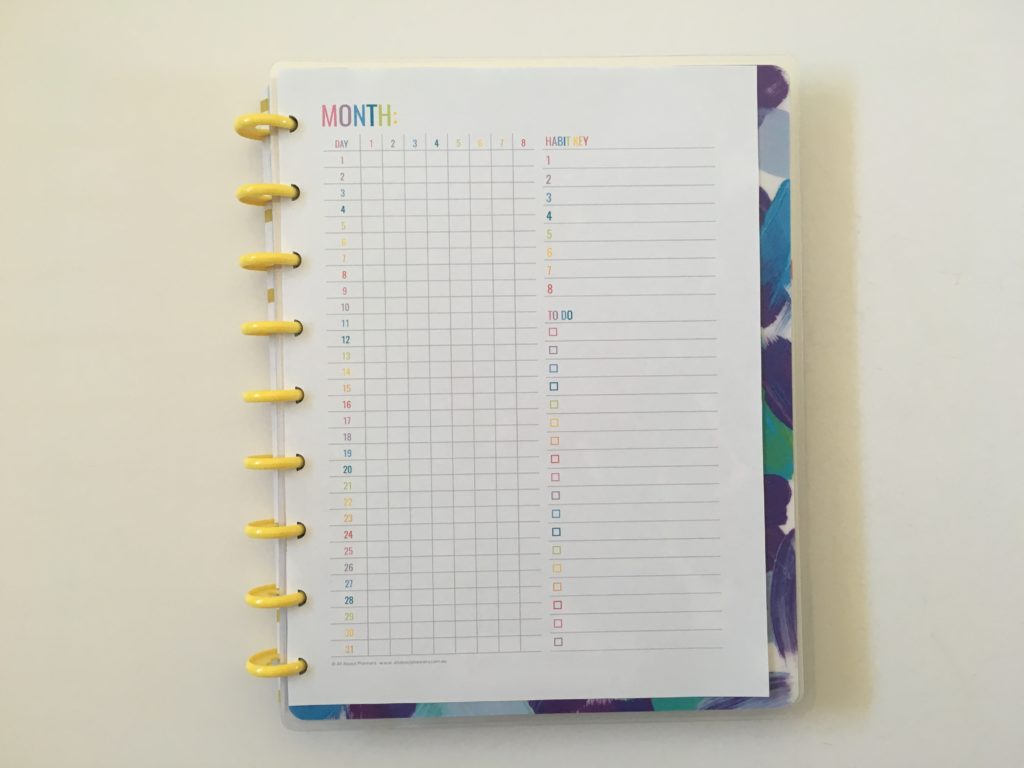
This habit tracker printable is from this kit in my shop.
Read more: Blog & project planning using printables resized for MAMBI Classic
For more printing tips, see this post.
More Happy Planner Posts
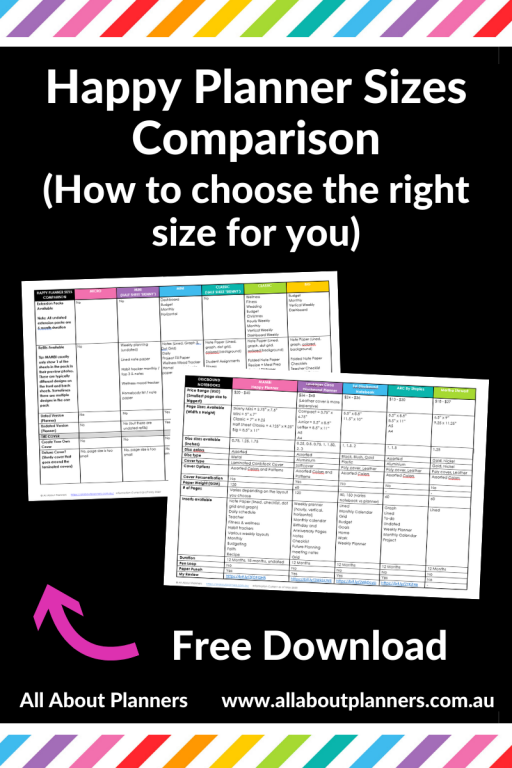
- MAMBI Happy Planner Mini vs. Classic vs. Big: which size is right for you
- MAMBI Happy Planner Discbound Punch versus the ARC (are they compatible?)
- MAMBI Happy Planner horizontal dimensions & measurements (classic size) for making planner stickers
Found this post helpful? Pin it!


[…] How to print printables at MAMBI Happy Planner Size (step by step tutorial) […]