A few weekends ago, my sister and I attended the Brisbane Planner Markets. If you’re planning on attending a craft show, trade show or handmade market soon, I hope this review post of what worked and didn’t work as well is helpful!
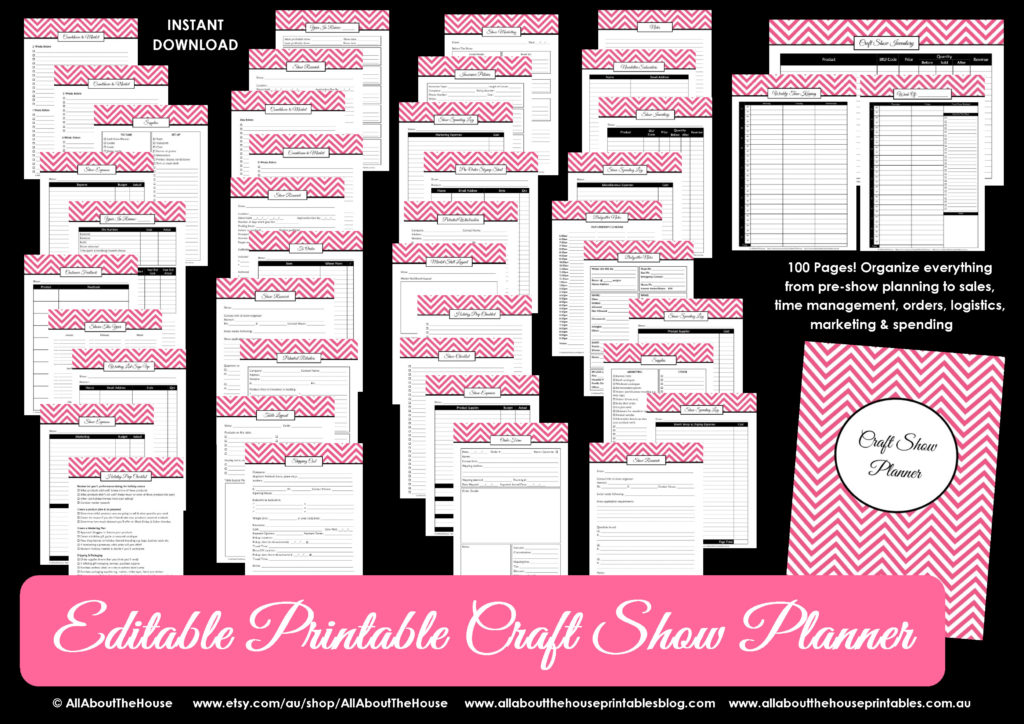
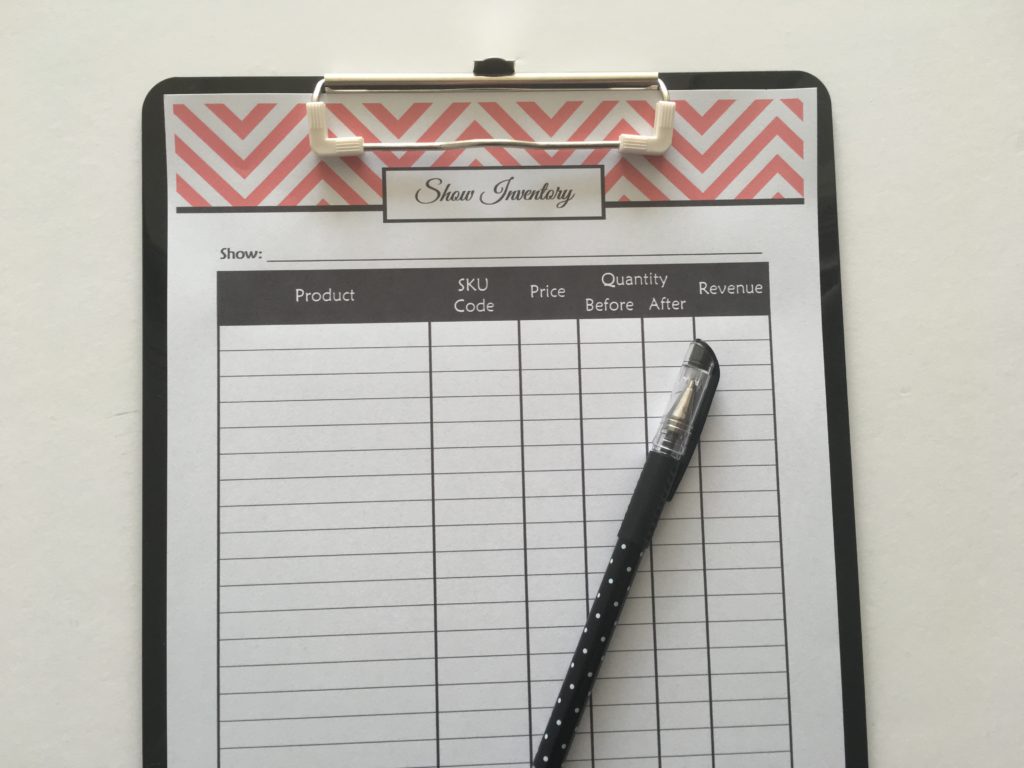
To keep everything organized including what needed to get done in the lead up to the markets as well as what supplies needed to be ordered and taken with us on the day, I created a craft show planner. I posted about it and shared pictures of what some of the pages look like in this post.
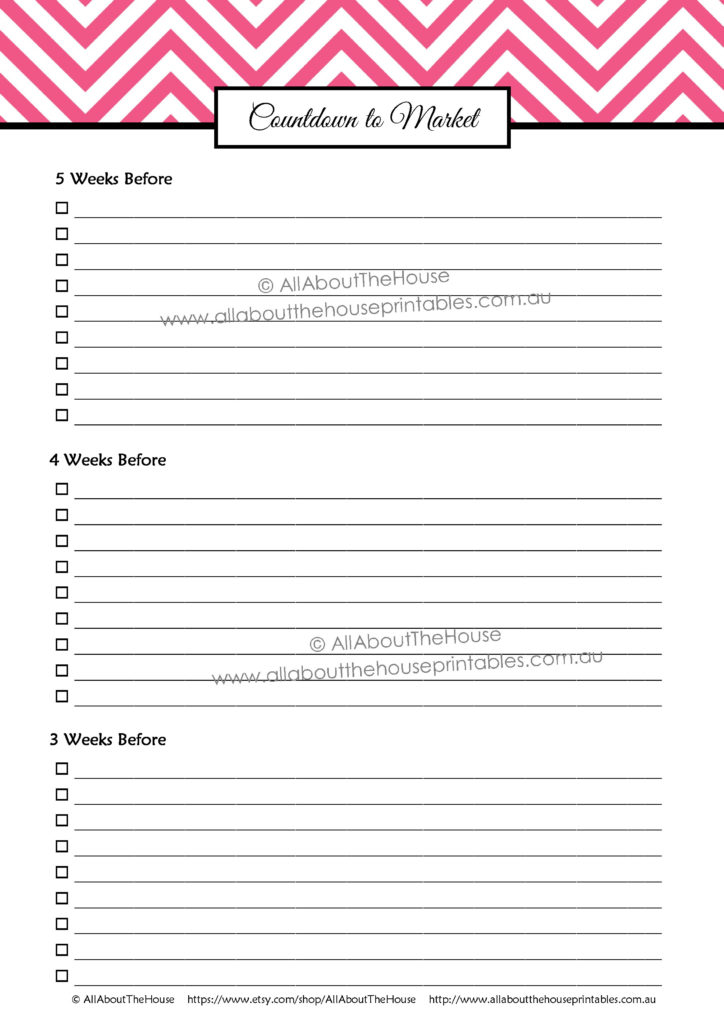
Because both my sister and I work full time in addition to our shops, our time is limited. We used the countdown to markets checklist to make sure everything got done on our weekends to make sure everything was organized in time. So here are some things to consider for each element of attending a craft show:
Pricing & labeling
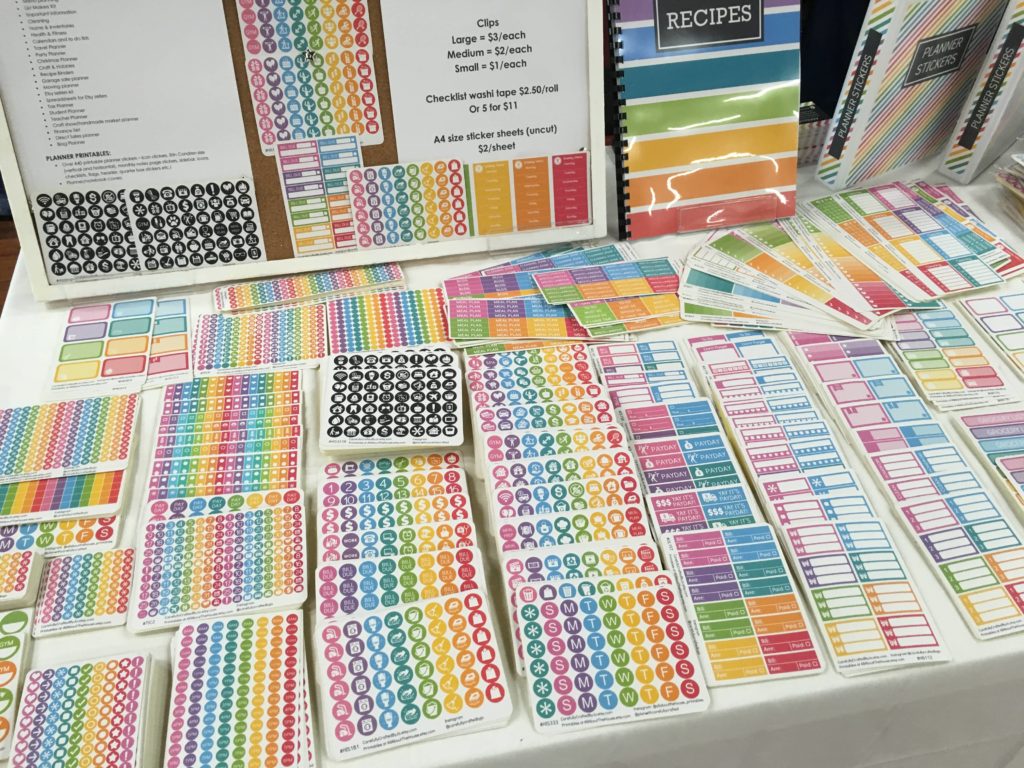
For my planner stickers, I created a price list, printed it out and pinned it to a pinboard. This helped created vertical height so everything wasn’t flat on the table. It also meant the prices were still visible after people had rummaged through all of the stickers on the table.
But if you have a large range of prices, and if you’re taking a variety of products, I highly recommend pricing each item you’re taking individually. This way you avoid relentless ‘how much for this?’ from people which takes away time you could be spending assisting customers and processing payments.
Pricing individually is also ideal if you have friends helping you out who don’t you’re your prices inside and out, especially if you’re offering discounted pricing (as you wouldn’t have to pay Etsy listing fees).
For products that couldn’t really be individually priced such as washi tape and planner clips, we used small signs with a printed out label like this one for the planner pens we had custom made:
We each had 2 tables so there was no way we were going to price each product individually, by hand. We used this pricing gun – make sure you check that it’s the pricing gun not the date line as my sister bought the date line by accident (which doesn’t have the dollar sign symbol then had to go all the way back to the store to swap it for the right one). The pricing gun was a bit of a pain to figure out how to reload new labels, but with the amount of time we saved it was definitely a worthwhile investment (and tax deductible!)
Related: What expenses can I claim? Free printable checklist with 100 tax deductions
When choosing a price, use whole numbers. So instead of $7.95 we priced at $8 – it’s not worth stuffing around with change for oddly priced numbers for 5c.
I recommend offering discount pricing when people purchase multiple. We offered a deal where if you purchase multiple sticker sheets you get the sheets for a discounted price- most people used the bundle price. Just make sure you don’t do too many discount offers that you confuse your customers.
Overall, pricing individual products worked well. We maybe wouldn’t do it for higher priced items next time as people tended to pick up a product, see the price and just move onto the next product, rather than looking at the product, getting really interested in it then asking how much after they’d already partway decided they wanted it.
Promo deals
The organiser of the Brisbane Planner Markets gave stallholders the option to include a discount coupon or freebie for the first 200 people in the door. We opted to go for a discount and did a tiered discounting system. So if they spent a certain amount they received a discount. My table had planner stickers which are a low cost item, I do think I should’ve offered a better deal i.e. a higher discount as not many people used it.
The tiered pricing coupon worked well for my sister’s table though, as she had a lot of higher priced items e.g. planners, so people were more likely to be spending a greater amount to begin with. She had washi tape and a few other lower priced items such as washi tape which were great ‘filler’ products for people to purchase to make up their order value to reach the discount threshold.
Organizing the boxes of stock
I can’t stress enough how important it is to label the boxes. We used these contents labels I originally created when we moved apartments a few years ago – they’re editable so you can type the text before printing. I then scribbled a dot in highlighter (pink for my shop and blue for my sisters shop). That way it made unloading much easier as we’d know which box belonged to who.
We also tried to pack the car so that her stuff was in the boot (as she had more bulky items than me) and my stuff on the back seat.
We put setup supplies such as sticker tape, scissors etc. in a green bag so they’d be easier to find.
The Day Before
We packed the car the night before as the market started at 9am so we had to be there at 7am to set up our tables. We were so glad we stayed up late the night before to pack the car to avoid it being a rush and having to wake up super early.
Because markets are usually an early start I don’t recommend packing your car the morning off – the time goes very quickly – much quicker than you think so don’t leave anything to the last minute that you don’t have to!
If you want the complete checklist of what should be done in the weeks and days leading up to the markets, there’s a checklist included in the my craft show planner.
The setup
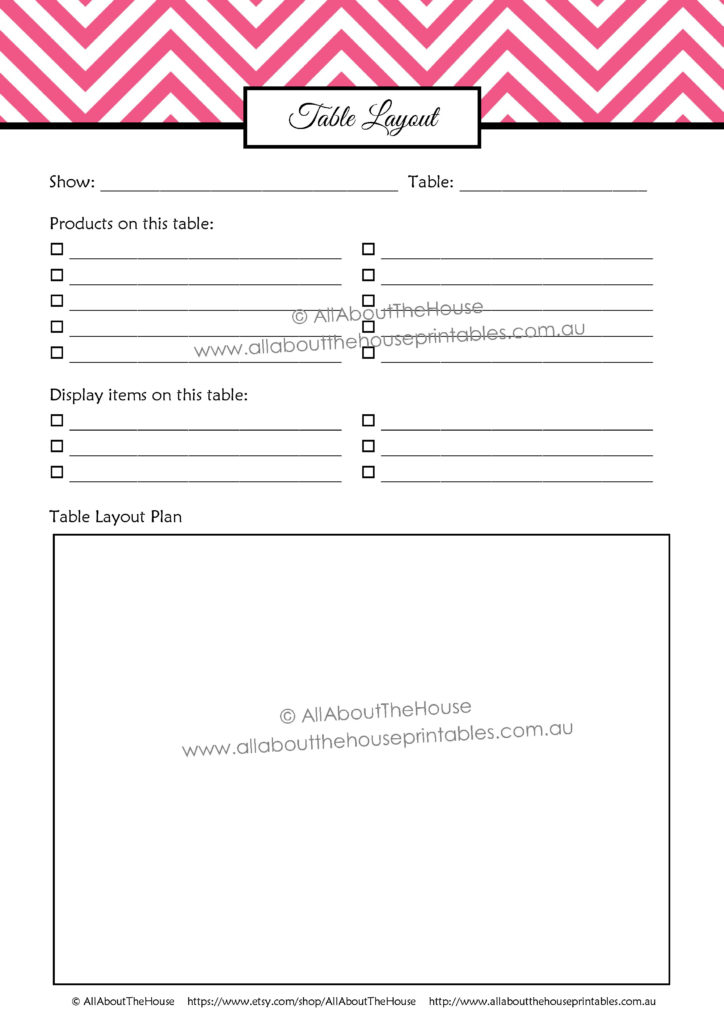
Don’t underestimate the amount of time it takes to set up your booth. We did a rough outline of how we were going to set up our tables (we each had 2 tables) using the table planner page from my craft show planner. We opted not to do a practice run setup because there is literally no room in our apartment to do that – it’s not a very big apartment to begin with and is already stuffed to the brim with dozens upon dozens of boxes of stock for my sisters shop!
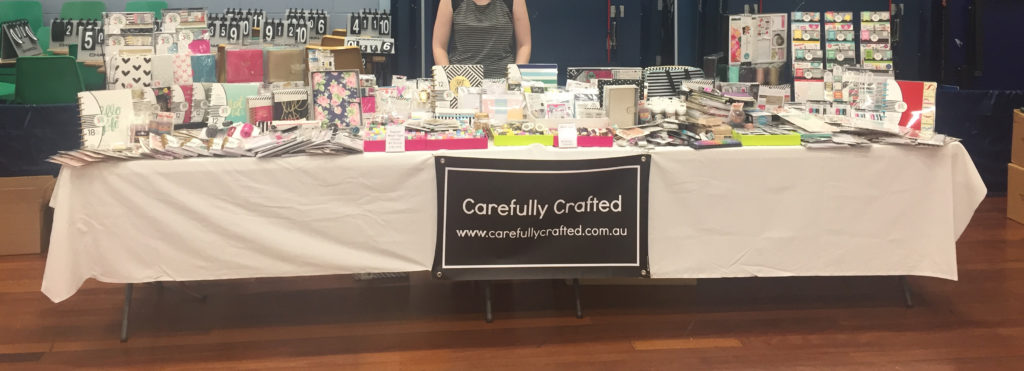
My sister didn’t want photos of herself posted on the internet, so here’s a picture of her table, with her cropped out :p
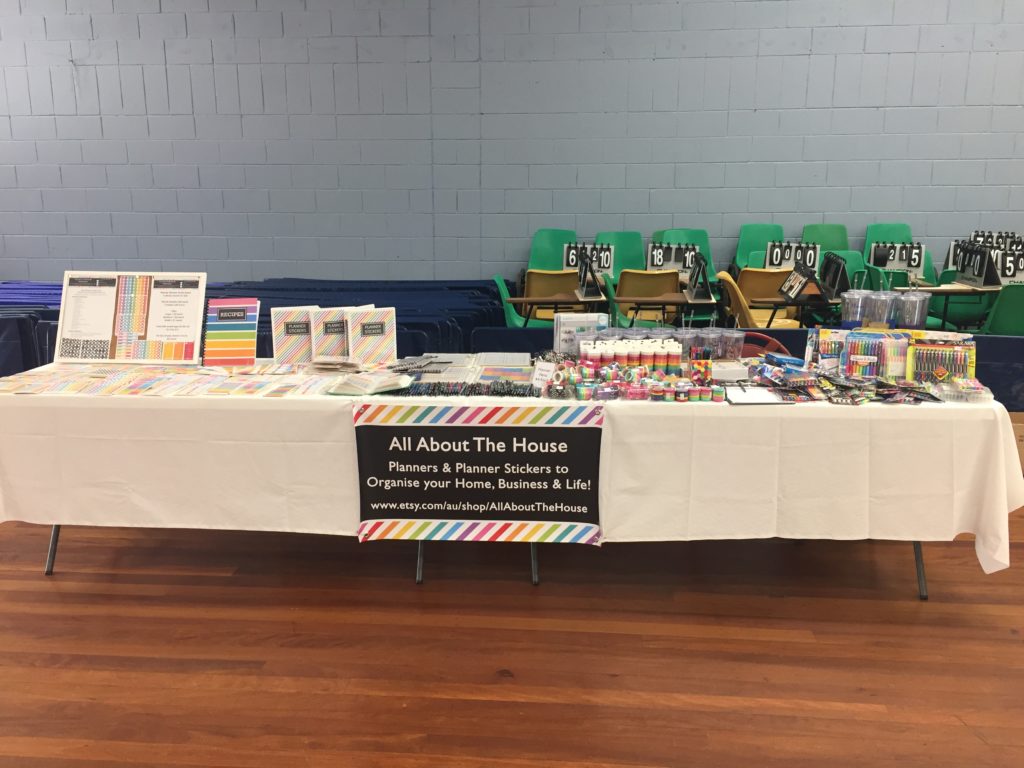
The table setup
It took an hour to set up our stalls (we did have a lot of products though).
The last Brisbane planner markets my sister attended solo (I had a friends party the same day and couldn’t go :() and it became clear that she needed height for her display and that everything was too flat. Unless people came right up to the table you couldn’t really see all the cute stock she had!
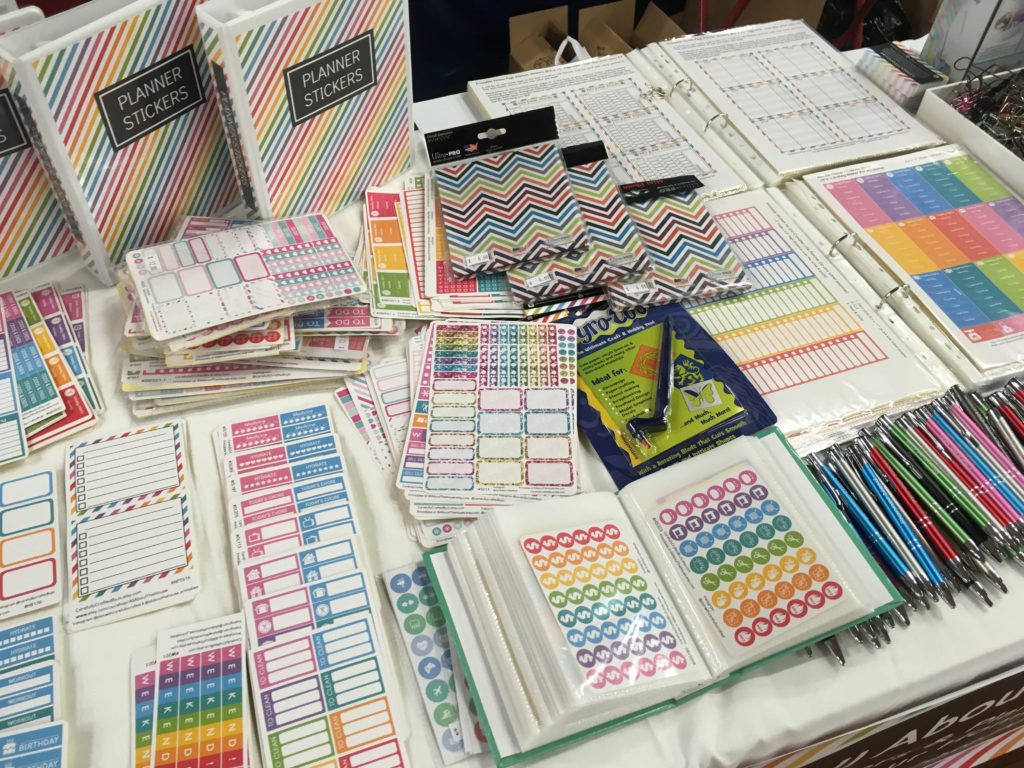
So she stalked Gumtree and found 2 black stands which were perfect for holding the Mambi happy planner sticker books and the mini Happy Planners. Plus they were much cheaper than if you were to buy them brand new. She also found some acrylic book holders which she displayed the planners on and which I used to support a pinboard with the price list and some stickers on my table.
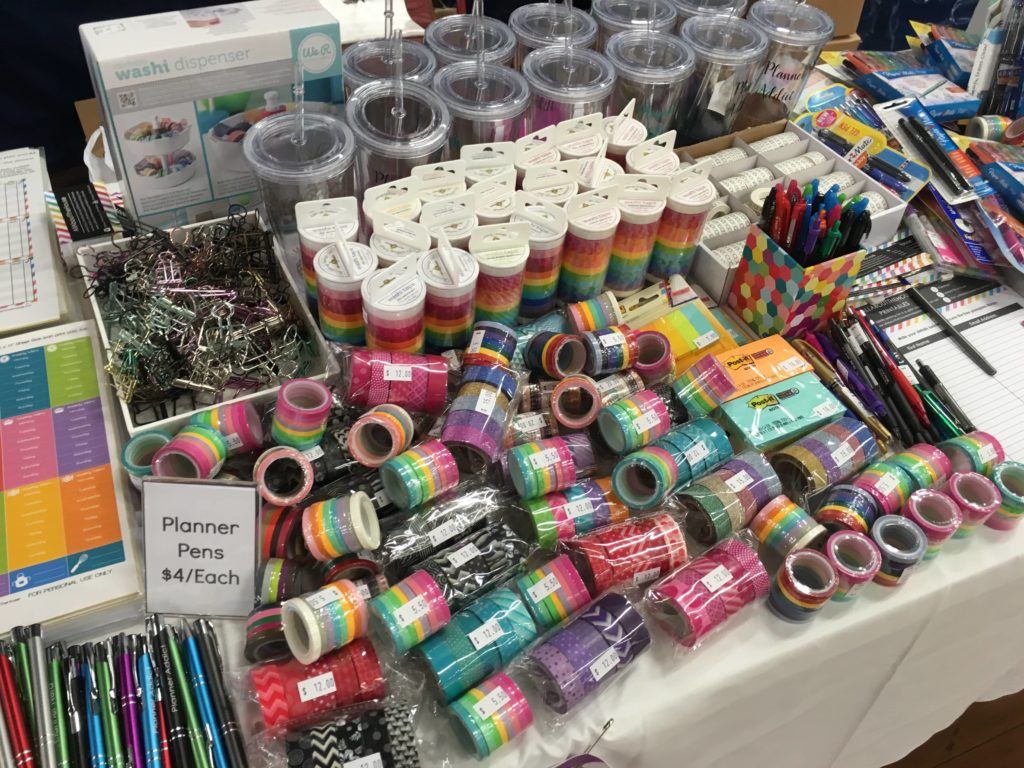
If you have a lot of small items such as washi tape, clips etc, give them small baskets to put stuff in as they browse so they aren’t dropping stuff everywhere. We put these loose items into small Poppin trays on the table.
Shame there’s all those random chairs in the background 🙁 (the markets were held in a sports centre).
Related: 13 Lessons learned after 13,000 sales on Etsy
Display
To get height I used cork board supported on clear pricing stands (like a recipe book holder) and stuck some of the planner stickers to the pinboard so people could see them from a distance.
Instead of laying the planner sticker binders flat we stood them up to also get some height on the table. We also used white storage boxes to store extra stock and also to act as stands for vertical height. One of the feedback from my sisters first market was that her display was too flat and when the table was packed 3 people deep that people were frustrated and left as they couldn’t see the stock. While we had more height on our tables this time around, I definitely want to raise things up using more stands next time.
I had binders with my printable planner stickers for people to flick through on the day, as well as a photo album with one of each sticker design that people could flick through and which I could then find for them. It came in handy when the table was packed and people couldn’t see the stickers, as I could just hand them the photo album and they could flick through it and tell me which sticker sheets they wanted to purchase.
I clustered like products together. So down one end was all of the stickers and at the other end was all the other assorted items – most of them were individually priced. I had the price for the clips and washi tape on the pricing pinboard and was asked sooo many times how much they were – next time I would definitely use the mini pricing signs like we used for the pens (in the picture below).
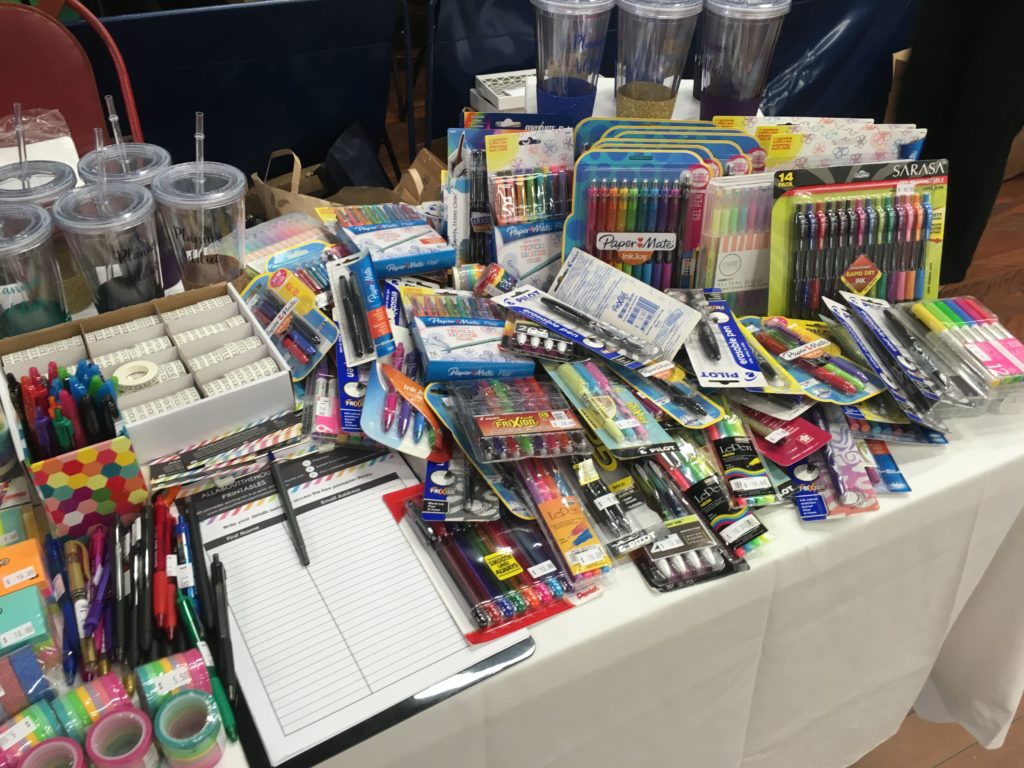
Next time I wouldn’t put as many of the same item on the table. So I would only put 1 type of each pen, 1 type of each of my favorite washi tape (Doodlebug’s rainbow washi) and just a couple of the tumblers not all of them. I think having multiples of the same item on the table reduced people’s urgency to buy.
There wasn’t enough room even with 2 tables, so I ended up just throwing the pens on there and letting people rummage. It looks messy but people seemed to enjoy rummaging through the stuff – they really liked picking things up and touching them – I guess because they can’t do that online!
Business cards
If someone looked interested I gave them a card. We didn’t get business cards especially printed with a coupon code to use in our shops after the markets which I think I would do next time as I didn’t really see a spike in sales in the days following the markets (in relation to how many business cards I handed out).
Related: How to make business cards for free
Money
Have a sign saying whether you accept credit card payments or not. You will be asked a dozen times if you take cash or card. We used money belts (I got them for $5 from the reject shop in the travel section if you’re a fellow Aussie reading this). We just kept them on a chair behind the tables. We used the square card reader and payment processor for card transactions (affiliate link).
Be sure to test the card processor at least a week before as it can take some time to set up and for the test transaction to be processed through your bank account.
The last markets my sister used a box to keep the money in, but we wouldn’t recommend this as it takes too long to rummage to find what you need. If you don’t have anything else but a box, I’d recommend using clip top bags for each type of coin.
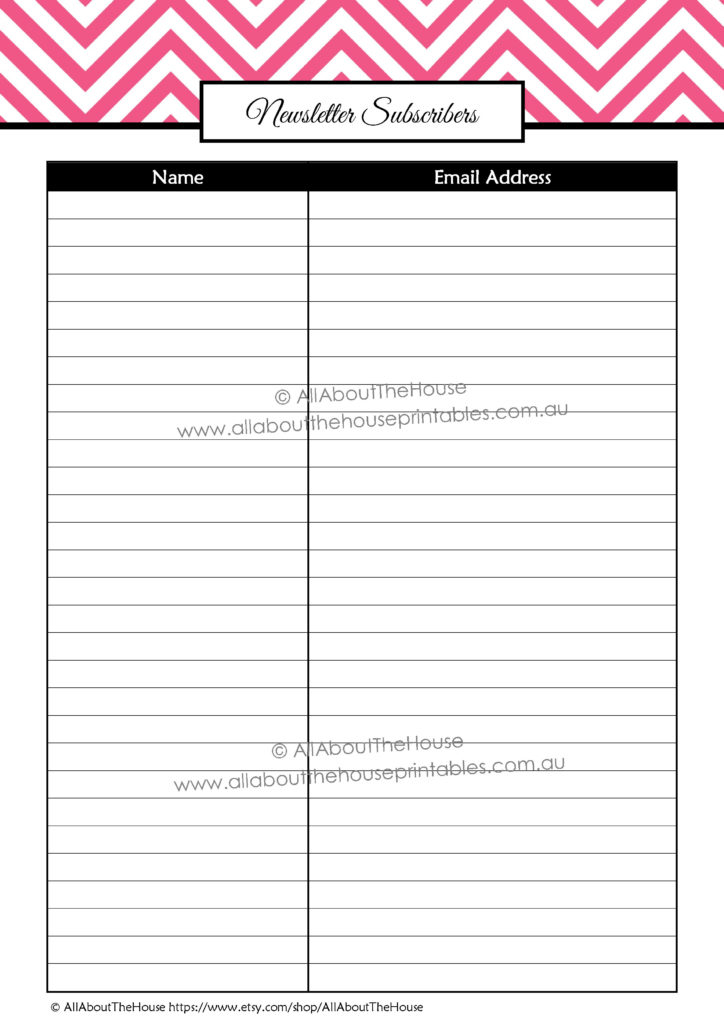
Collecting email sign ups
Only a handful of people signed up to follow my blog on the day. I didn’t want to be pushy and promote it I just put a clipboard with a signup sheet on the table. Next time I think I’d put this on a stand so it was vertical and people were more likely to see it.

There’s a printable sign up sheet in the craft show planner kit.
How it went
There was 55 stallholders at the Brisbane Planner Markets. I definitely think this was too many. My sister was a stall holder at the first one where there was only 15 stalls and she thought the same amount of people attended. So the revenue was smaller for a lot of the stall holders.
To be honest I was disappointed in the other stall holders. Most of them just sat there and didn’t even stand up when a customer went to their table. Some of them didn’t even say hello. I was browsing one stall and wanted to ask the price of one of their products, but they were too busy wrapped up in a conversation with their friends!
Most of the stall holders also had limited stock I.e only 10 different types of sticker sheets. A lot of them were grumbling about not making much money and I do think the fact there were more stall holders contributed to this, but also think the fact that they didn’t have many products or a large variety of products could have also contributed.
Was it worthwhile?
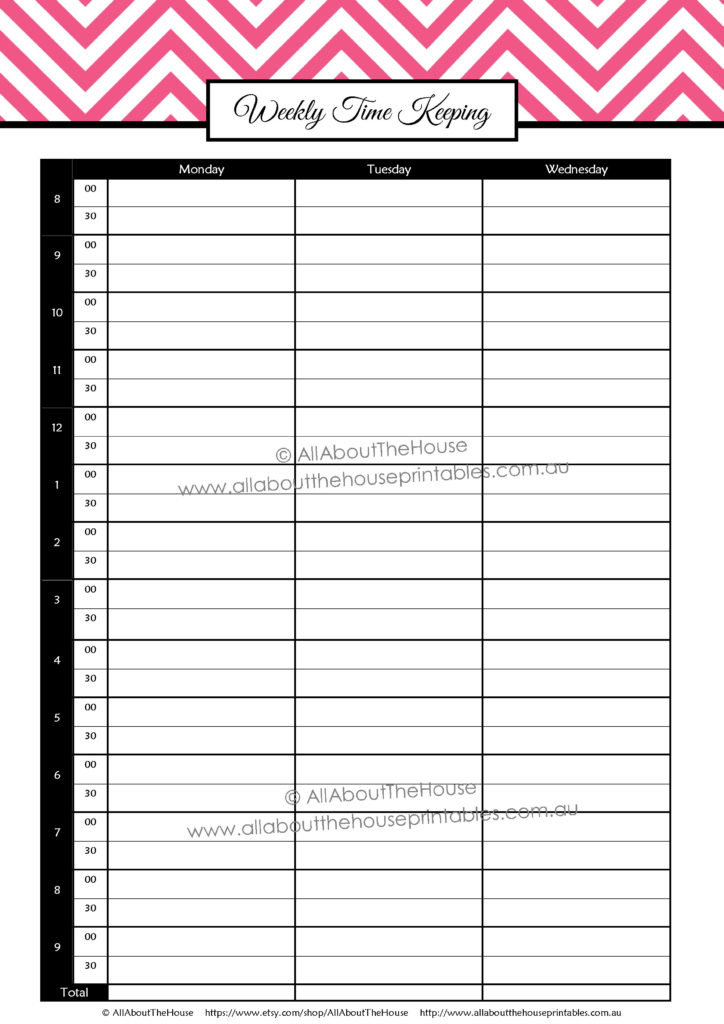
In order to determine if attending a show was worth your time you need to look at how much time you invested not just how much money you made (and make sure you use profit not just revenue!). To track how much time you spend prepping for a craft show, there’s a weekly time keeping 2 page planner spread in the printable planner kit.
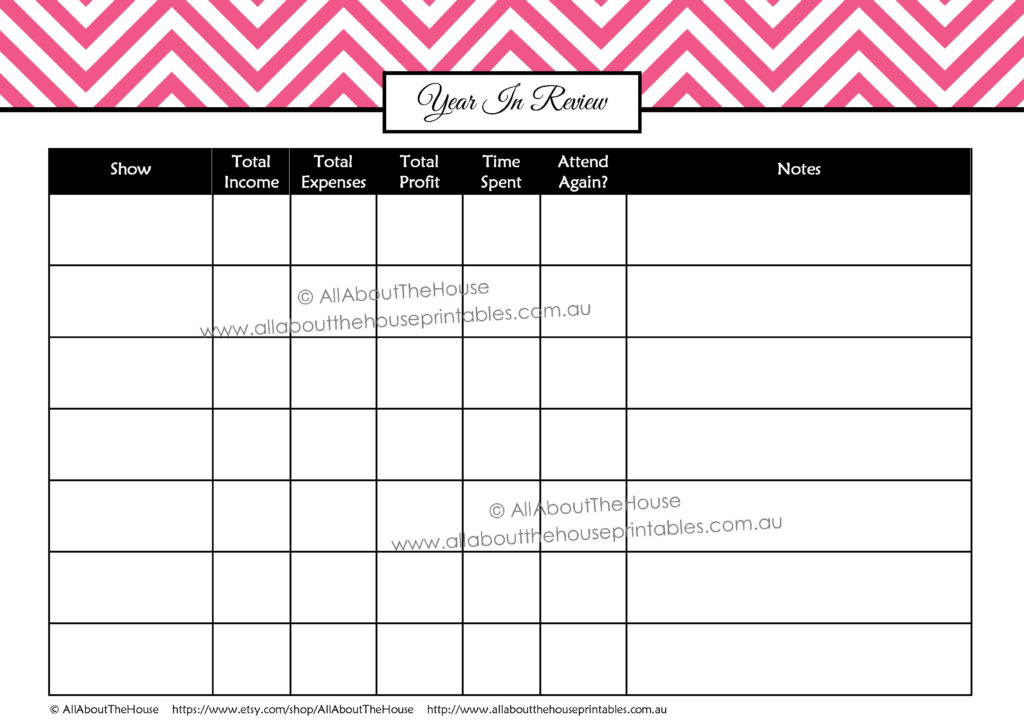
After the show I did a review using the shows in review page. The page is set up for multiple craft shows so if you regularly attend markets you can see which ones are most worthwhile.
Profit is the amount leftover after expenses are paid and cost of goods sold are deducted. I took this profit figure and divided it by the hours invested in prepping for and attending the markets.
The rate per hour will be different for everyone and depends on the products you sell so I can’t say what is considered a ‘good’ hourly $ return or not. But if you’re spending 30 hours prepping for a craft show only to make $500 I’d say that’s definitely not worth your time. Work out how much you want to be paid, track where you spend your time each time you attend a craft show and use this to determine if it’s worthwhile attending multiple craft shows per year, or just attending the most popular ones.
What we would do differently
- Even though my sister ordered stock in January some of it still hadn’t arrived 6 weeks later in time for the planner markets in March, although this was a supplier fault of them forgetting to update their website and things being on back order. Normally this would have been more than enough time to order stock. Next time, just to be on the safe side, my sister will probably order even earlier
- When we print and cut planner stickers (we are a ready to ship sticker shop), in the months leading up to the markets we would print and cut a couple of extra sticker sheets to have around double the number of sticker sheets we would normally have in stock. This way we still had some leftover after the markets so we weren’t scrambling to fill Etsy shop orders
- Your stall needs height – I do think my table would have benefited from some height with more boxes or shelving displays which I’ll be exploring next time
- I dumped the pens on the table in an unorganized fashion and there were some duplicates – I ended up taking the duplicates away and keeping them in a box behind the table to restock as they sold. The stickers were also a bit messy and not in their piles sorted by type after people rummaged through them so I probably wouldn’t put as many of each sticker sheet out on the table as well
- If you can set your display up to have a couple of things on the ends of the table – do it – as you can get another 3 or 4 people looking at your store at the same time = higher chance of making a sale
Related: Etsy Sellers: are you making these 54 Mistakes?
Other tips
- Stand don’t sit. Yes your feet are going to be sore from standing by the end of the market but if you’re sitting down playing on your phone people are going to just walk on by. At the same time don’t be too friendly just a simple hello is sufficient!
- Use a white tablecloth (or we used white fabric) – no tablecloth looks like you’re under prepared and a patterned tablecloth can make your table too ‘busy’
- Hunt Gumtree and eBay for discounted display stands. Officeworks have brochure stands but they’re really expensive – we found 10 of them on Gumtree for the same price as 1 at Officeworks
- If there’s the option for 2 tables – take the 2 tables if you know it’s a popular market. The cost of paying for a table is very low compared to how much money you can make at these types of events – as well as the money you can make after the event from all those business cards you handed out
- People like to see and touch the product. I made more sales because I had pens out of the packaging so they could test try how they worked (especially the frixion pens).
Supplies List
If you want to know where we got stuff from, here’s the list:
- We purchased white fabric from spotlight to use as a tablecloth
- The banner was from vistaprint – I made it in Photoshop the same way I made my Etsy store banner – just at Vistaprints size specifications – see this post for a tutorial. We secured it to the fabric tablecloth using safety pins
- I made the business cards using Photoshop. If you don’t have Photoshop I shared a tutorial on how to make business cards using Canva. We had them printed using Vistaprint
- Tables were supplied for us on the day as part of the stallholders fee
- We purchased the stands off of Gumtree. Officeworks have them but they’re really expensive
- I used a pinboard that I already had at home but you can find them inexpensively from discount stores – they’re a really good way to showcase your products and get some height on the table. Plus you can reuse them each time you attend a market. I sat it on the table using stands (like the ones you can get to hold recipes)
I hope you found this post helpful for planning your next craft show / trade show / handmade market. If you want to purchase the printable planner kit (it’s editable), it’s available in my Etsy shop in a few different colors. If you want to take a closer look at the included pages, see this post.

Leave a Reply