I’d heard of Trello before but I’d never actually used it, so for week 11 of the 52 planning systems in 52 weeks challenge) I decided to give Trello a go.
Using Trello to plan my week
Trello is a free online tool. To use it, all you need to do is create an account.
The main feature of Trello is the ability to create different boards. To plan my week, I decided to use 1 board as I thought it would be more convenient to keep my weekly plans in the 1 place.
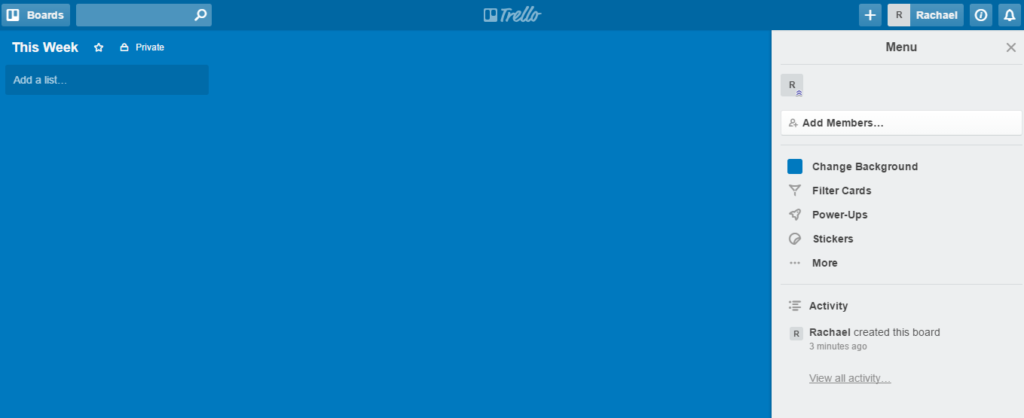
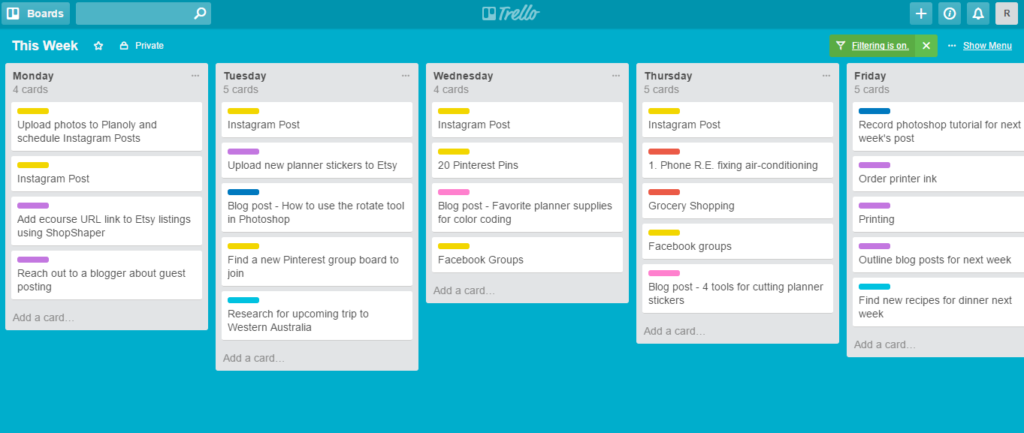
Within a board you can add cards. I added 1 for each day of the week. I considered planning the week by category rather than by day (like I did in week 5 of the challenge) as I tend to plan what days I’m going to do things but then end up switching it around. But since Trello gives you the ability to quickly and easily drag and drop tasks between cards, I decided to do 1 for each day of the week:
I am by no means an expert on Trello but if you’re using it for the first time, here are some tips:
To move cards between days just left click with your mouse and drag to the day you want that task to be placed instead.
Left click and move left or right to pan across all of your boards.
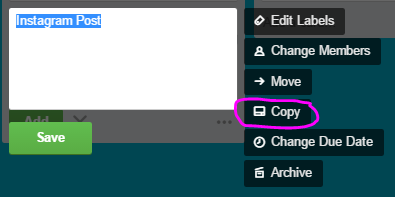
You can copy a task by hovering your mouse over the top right of the task until the pencil icon appears. Click that and choose ‘copy’ from the dropdown menu. Then choose where you want to copy it to.
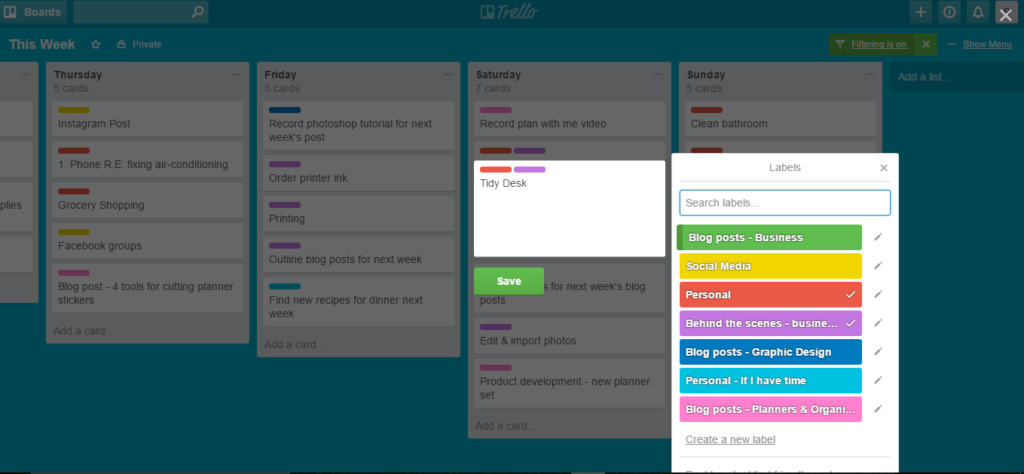
Color coding using labels
One of the features that made me want to try Trello is the ability to label and color code tasks (I almost always color code my planner).
To do this, hover your mouse over the top right box of the task until the pencil icon appears. Click that and the same menu as above will appear. This time choose ‘edit labels’
These are the colors/labels I used. I kept them similar to the colors I usually use when planning but with a few extra:
- Purple = behind the scenes
- Green = blogging about Etsy & online business
- Yellow = Social media
- Pink = blogging about planners and organizing
- Dark Blue = blogging about graphic design
- Light blue = personal (if I have time)
- Red = Personal
If I was going to use Trello again I’d change the colors and use 2 shades of the same or similar colors for personal. So instead of having the 2 shades of blue belonging to completely different categories, I’d use orange for personal (if I have time) and yellow for personal, as these colors are similar.
You can also assign multiple labels to the same task which would be handy if:
- You had multiple people collaborating on a project)
- You’re a mom (you could use one color for you and one color for the rest of the family)
- Meal planning – one color for dinner but then another color to the dinner meals that require prep the night before e.g. marinade
Other ways you could code your plans using different colors:
- Track the status of a task e.g. yellow = started, green = in progress, blue = done
- Priority e.g. red = urgent, orange = due within the next couple of days, yellow = if you have time
- Who is responsible for the tasks
- Duration of the task e.g. 30 minutes, 45 minutes, 1 hour
- Color code by day – when you don’t complete a task and move it to another day you can see if you’re over-scheduling. So if you use blue for Wednesday and your cards have a lot of blue, then you know to reduce the amount you schedule on Wednesdays
Related: How to color-code your planner (so you’ll actually use it effectively)
End of the week
You can re-arrange tasks by left clicking and dragging up or down. I set up my week with all of the tasks that needed to get done, then re-ordered them from ‘do first’ at the top down to the tasks I would only do if I had time.
I ended up with lots of tasks on Saturday and Sunday as this is when I have the most time to work on the blog and my shop. I really liked the ability to drag and drop tasks to different days as things took longer than expected, or if inspiration struck and I was itching to outline a post idea (which often turns into me writing 90% of the post).
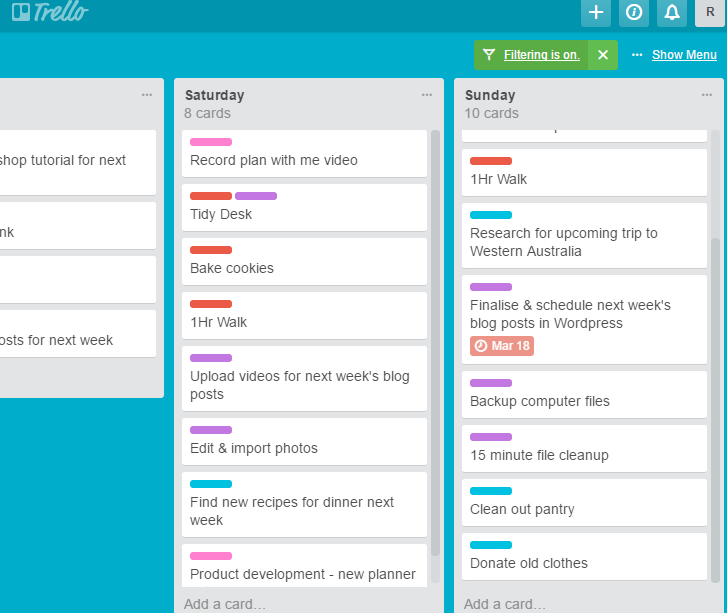
A checkbox function on each task would’ve been handy to see what is done and what is still to do. I ended up dragging tasks to the bottom of that day’s card once completed.
Pros of using Trello to plan your week
- Quick and easy to set up
- The free plan will be sufficient for most people (yay for free things!)
- Quick to move things around and rearrange — Because it’s digital I loved that I could just copy and paste tasks that need to occur each day such as posting on Instagram, replying to emails etc. rather than re-writing multiple times in a paper planner
- I also loved that if a task needed to be moved to a different day I could just drag and drop to move – no whiteout, no need to re-write – it reminded me of sticky notes but without any wastage and there’s no limit to how many you can have (which is both a good and a bad thing!)
- Can choose which day of the week to start – if you choose to set up your week like I did (rather than by category) than you don’t have the same issue of finding a paper planner you like, only for it to start on a Sunday when you wanted it to start on a Monday (or vise versa)
- They have an app you can download so you can take your plans with you on the go
- If you did want the extra features that come with their paid plan, it’s affordable at only $10 / month. When you add up the cost of a paper planner, shipping, colored pens (can never have too many of them!), stickers etc. – Trello would likely work out cheaper
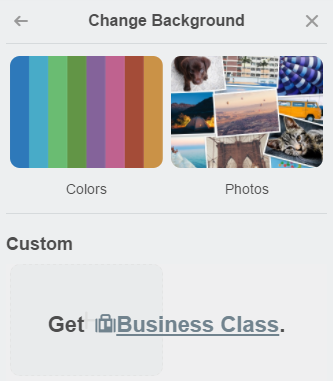
- Can personalise boards by adding an image instead of a solid colored background
- You can sync with Google Calendar – this would be an ideal method for creating a blog content calendar
Related: 101 Blog Post Ideas (for any type of blogger)
Cons of using Trello to plan your week
- Need an internet connection to use Trello
- Can’t zoom out. No matter how much Googling I did I couldn’t find a way to see all of the week on one screen (if anyone knows how to do this please share in the comments below!) This was a big negative for me. Having to pan to the left and right all the time to add tasks to the cards and move things around was annoying. When you end up with quite a few tasks on the one card you have to scroll to see the rest of them (although pressing CTRL and F on your keyboard and doing a search for the task will find it fairly quickly).
- Because it uses the internet, the tab with Trello can get lost among all your other internet browser tabs (I wish there was some way to color code tabs!)
- It would have saved time if you could set a default color for all new tasks (there may be a way to do this but I couldn’t figure out how)
- A checkbox function on each task would also be super handy to see what is done and what is still to do. I ended up dragging tasks to the bottom of that day’s card once completed
Would I use Trello to plan my week again?
I’m a pen and paper person. I always have too many tabs open at once in my internet browser so having another one open to see the plans for the week was not ideal.
I think this would be very handy for a weekly reference list if you’re always at your computer for work and blogging to dos, where you don’t really need these to be ‘portable’ because you’ll be completing those tasks at your computer anyway.
If I were to continue using Trello I’d take advantage of the ability to add more boards. I’d keep separate boards for:
- Blogging and business tasks (and within that separate cards for people to reach out to for collaborations, blog post workflow etc.)
- Blog post ideas
- Product ideas for my Etsy shop
- Personal
I don’t think I would use Trello as a weekly planner as I prefer to have this on pen and paper where I can take it with me and it’s always within reach, but I may consider doing a weekly routines and blog post ideas boards in Trello.
One problem I can forseee with Trello is that because you can add as many tasks as you like you’ll probably end up over-scheduling.
While there is a Trello app so you can take your plans with you on the go, I already use the notes section of my phone to jot down blog post ideas which has been working well for a few months now. If I didn’t already use the notes app then Trello would be a good alternative.
Related: How to keep track of blog post ideas on your phone (no paid app required)
Other ideas for using Trello
Overall, I don’t think I maximised all of Trello’s features. Some other board ideas could be:
- Tasks to do for each blog post (workflow such as outline, create images, proof read etc.)
- Big goals broken down into more manageable tasks e.g. making an ecourse
- Tracking routine tasks that need to be completed every day or sometime each week such as bin day, meals etc.
- Vacation planning
- Family planning – this would be ideal for the extended family so everyone can see who is available to catch up & when
- Wedding inspiration – you can add images to cards although if you were using a lot Pinterest may be a better option
- Countdown checklists e.g. if you’re moving house
- Cards for to do, in progress, completed
- By importance – urgent, not urgent, delegate
- Planning big projects such as writing a book or launching an online course
- Managing and collaborating with a team on a project
- University/college assignments
- Routines – cards for daily routine, every couple of days, weekly, monthly etc.
- Home DIY project’s – could organize by room or urgency
- Recipes to try
- Favorite meal ideas / meal planning (you can even add pictures to the boards although I personally finds this makes the boards a bit cluttered)
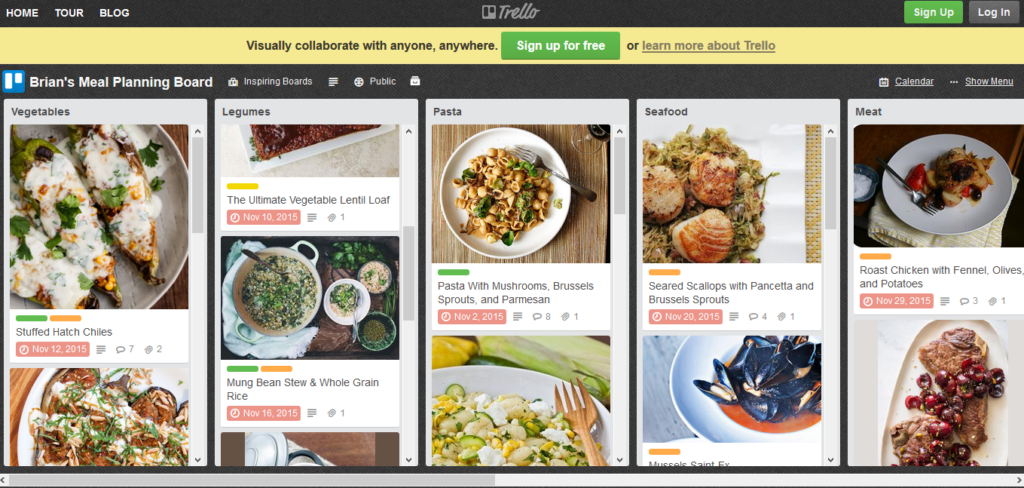
Trello has an entire inspiration page you can look at and see how people have set up Trello boards for various things such as life goals, content calendars etc.
Other features of Trello that can be used for planning
I’ve considered using Trello for blog planning. If you’re also thinking about doing this, here are some features that may be of interest to you:
- You can also add images and files to each task (which I didn’t realise until after the week had ended), so it would be a good tool for managing a team (or even a group assignment at school or university)
- Integrates with Zapier to set up recurring tasks
- Can share boards if you’re collaborating with other bloggers or a virtual assistant/s
- Can add due dates
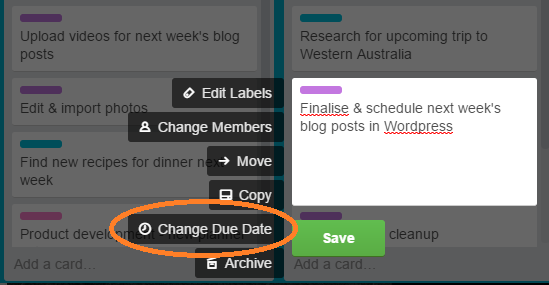
Adding Due dates
Due dates give you the motivation to actually finish something and you can add them to each task in Trello.
To do this, hover your mouse over the top right box of the task until the pencil icon appears. Click that and the same menu as above will appear. This time choose ‘change due date’
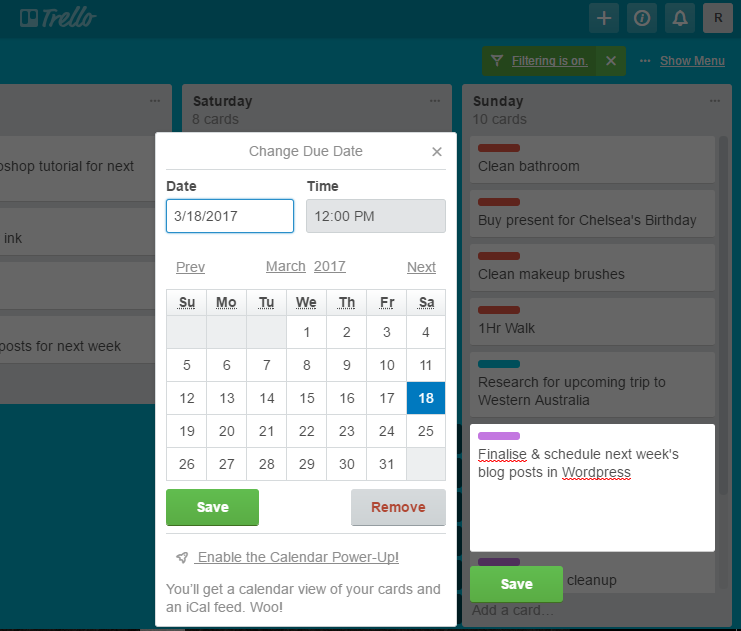
Then select the date from the calendar that’ll pop up
I hope you found this post helpful – If you use Trello, please comment below – I’m curious to see how other people use it!
Liked this post? Pin it!
This is not a sponsored post – all opinions are my own.
Leave a Reply