In addition to trying different planner layouts to plan my week. This year I’ve been experimenting with different ways to keep track of blog post ideas. One method that’s worked quite well is using sticky notes in a notebook. So simple!
What you’ll need:
- Small sticky notes Small sticky notes (I use the Post it 3M in the 5cm long x 1.5cm high size – they come in a pack with 10 different colors so they’re great for color coding)
- Medium size sticky notes (2 x 2”) – you can use the 3 x 3” size but I find them too large
- Notebook (I use Plum Paper)
- Doodlebug chevron washi tape to split up the page (or just rule a line in pen)
Don’t skimp on sticky notes – you want ones that will stay sticky for a long time!
To enlarge the screen of the video, click the square icon in the bottom right hand corner of the video (it will say ‘full screen’ when you hover your mouse over the icon).
Subscribe to my YouTube channel for more planner related videos & graphic design tutorials!
Setting up the page
Step 1: Choose your colors
How many categories you blog about will determine how many colors of sticky notes that you need. I blog about 3 main topics:
- Planners
- Graphic Design
- Running an Etsy shop / online business / blogging
Be careful when choosing colors to code each of your categories – you want to make sure the colors you use are readily available in a variety of planner supplies (pens, sticky notes, planner stickers, paperclips etc.). For example, purple is not as common as pink, yellow, green and blue. I also don’t recommend using yellow as yellow pens are hard to read. Red is easy to find in pens, but not so easy to find for sticky notes. So that’s why I chose pink, blue and green for my category colors.
I’ve shared a few posts on how to color code your planner if you want more tips and ideas!
- Planner Organization: How to color-code your planner (so you’ll actually use it effectively)
- Favorite color coding planner supplies for less than $5
- Ultimate list of the best planner pen brands and how to choose colors for color coding
- 50 Category Ideas for Color Coding Your Planner
- How to organize and color code your notes for school, college or university
- Color coded monthly meal planning using sticky notes
Step 2: Set up your idea bank
You could set your notebook up for all 52 weeks of the year, but I don’t like to plan that far ahead.
I tend to plan a month in advance and leave the flexibility to switch it out (which is why sticky notes are a good idea, you can quickly move them from month to month, there’s no need to cross out or white anything out).
I come up with about 5 blog post ideas per day. Some post ideas I get really excited about and want to post right away, which is why I like using sticky notes so I can move things around as I change my mind about what posts I’m going to publish.
Related: 101 Blog Post Ideas (for any type of blogger)
I keep an idea bank of all post ideas I want to publish on the relevant colored sticky note. If I come up with post ideas while I’m away from my desk, I’ll record them on my iPhone or in a notebook and write them on a sticky note when I get home.
I’ve used a couple of different ways to keep track of blog post ideas including:
- Simple method for organized brain dumping of blog post ideas using a notebook and zooms
- How to keep track of blog post ideas on your phone (no paid app required)
- My weekly blog planning process (how I organize and plan for the week ahead every Sunday)
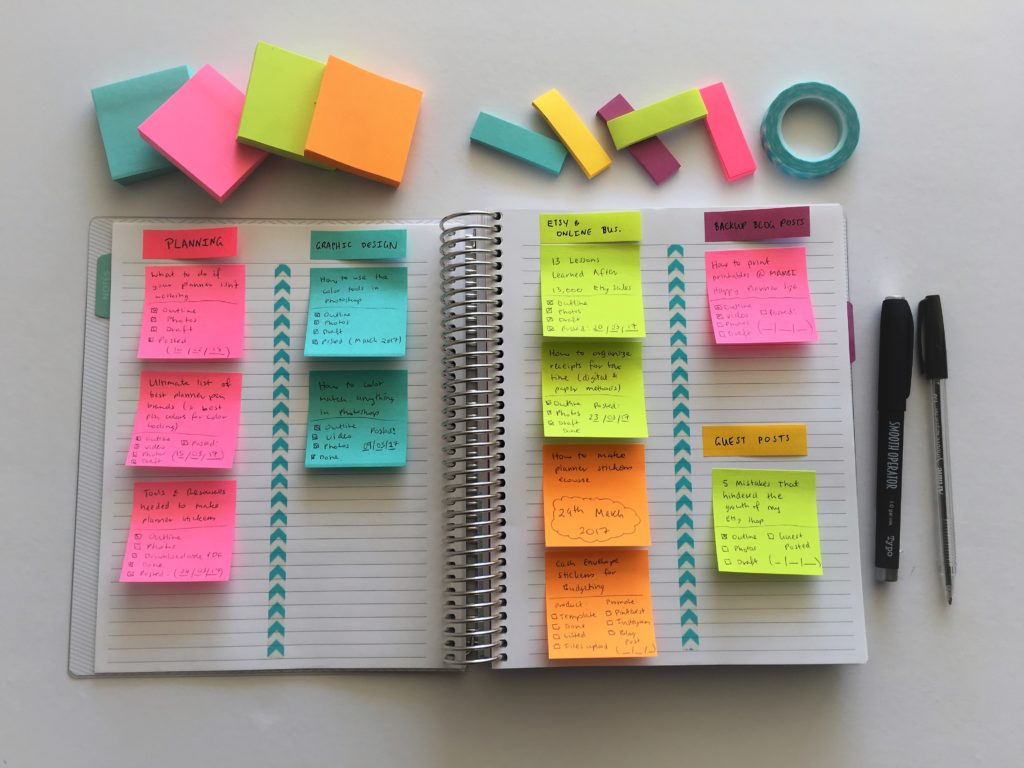
Step 3: Set up your weekly content planning space
Depending on how often you plan, this page setup may work for a fortnight or even an entire month. I’ve been using this layout for a week’s worth of posts (I typically post 4 – 5 times per week)
- Use a pencil to mark the mid-way point on your notebook – do this at the top and the bottom to act as a guide of where to put the line
- Using either washi tape or draw a line to separate the page into 2
The washi tape I used is by Doodlebug from my sister’s planner supplies shop (it comes in chevrons – my favorite! as well as polka dots and stripes). Washi tape is a a good way to add a pop of color to your planner! The Doodlebug brand is expensive washi tape but it stays stuck down unlike some of the cheaper washi from China, comes in lots of pretty rainbow colors and there’s a lot on the rolls so they last a long time.
If you don’t publish posts very often, then you could split the page into quarters.
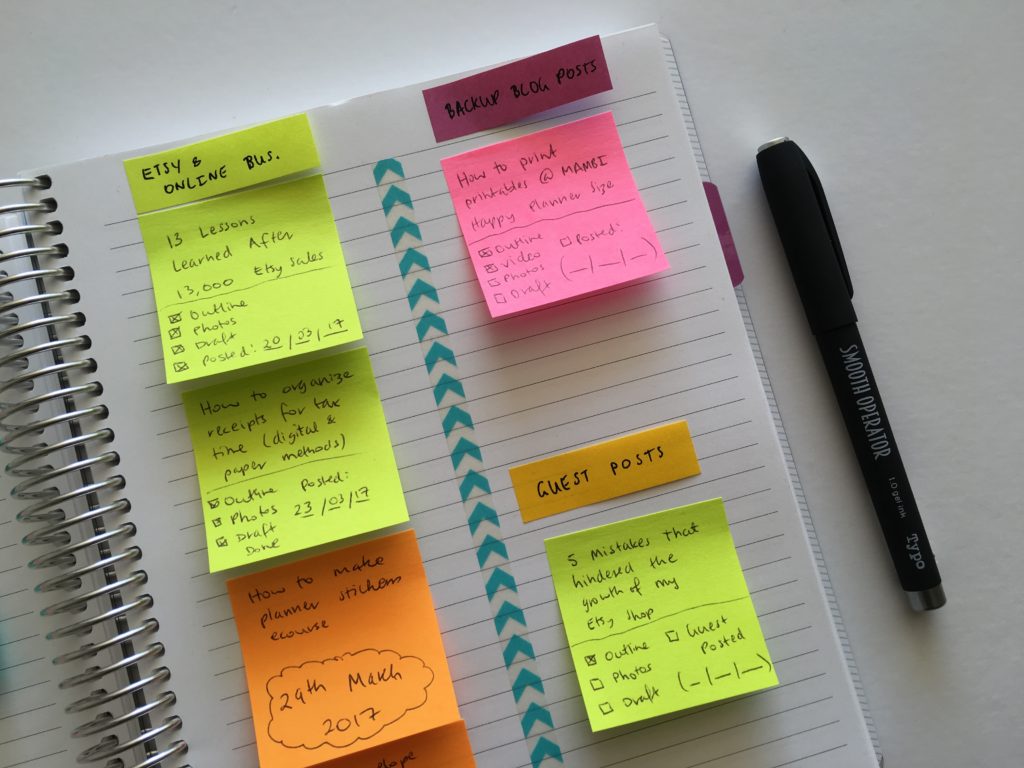
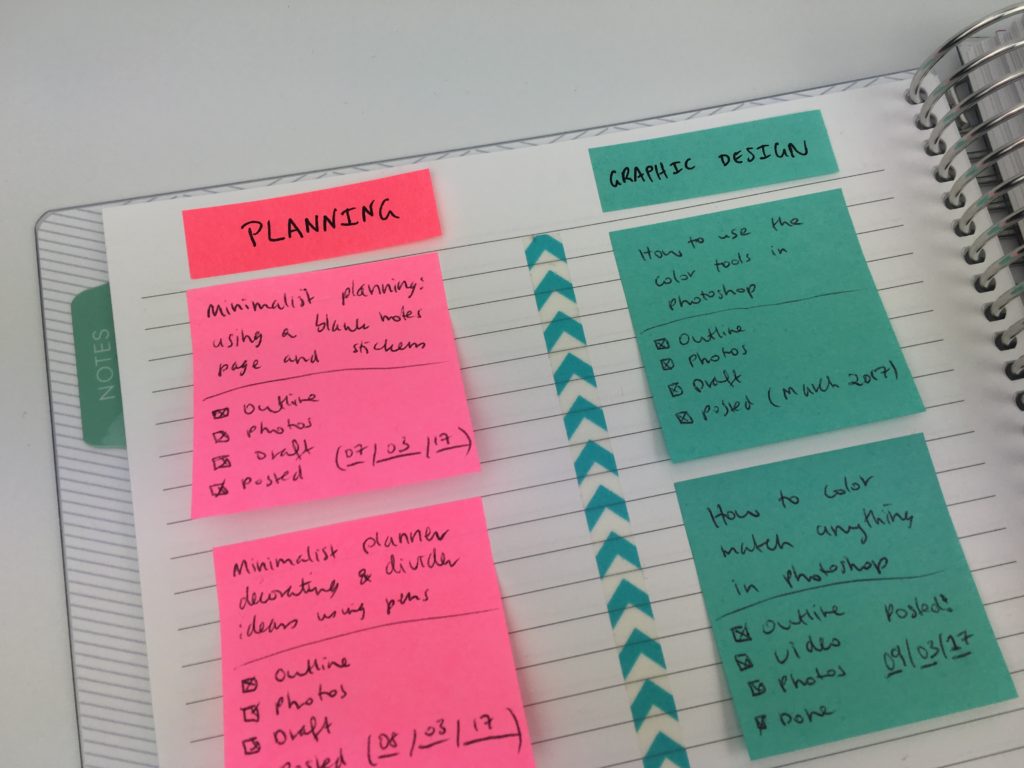
This is how my spread looks:
Step 3. Write the titles of the categories you plan on small sticky notes
If you didn’t want to use sticky notes for this part and you aren’t likely to want to change your headings / categories that you blog about, you could always just use pen.
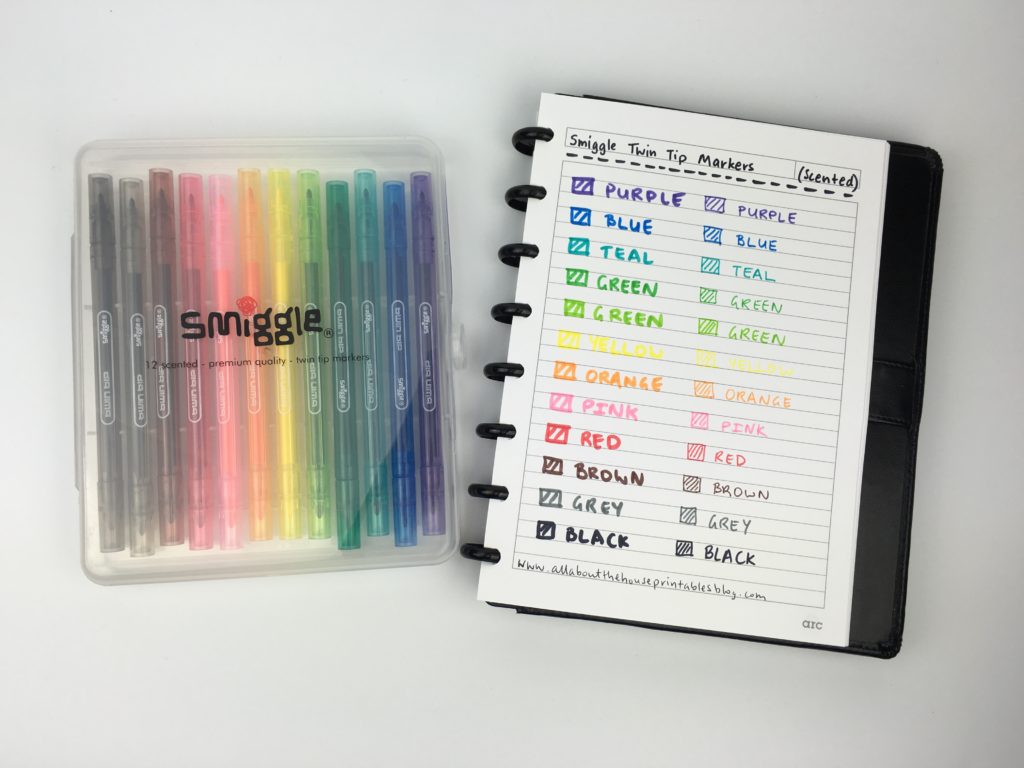
I prefer to use thicker marker style pens for titles to make them stand out more. Some of my favorite brands are the Triplus color 1.0mm and Smiggle twin tip markers.
Step 4: Choose what posts you want to publish
I tend to do 4 – 5 posts per week so I typically use 1 of these spreads for a week, sometimes 2 weeks.
Write down all of your post ideas on sticky notes, using different colors for each category that you blog about. Or if you only have yellow sticky notes, place a colored dot or scribble in pen in the color to color code that way.
I use 2 x 2″ sticky notes – they’re just the right size without being too big and come in lots of colors. I use the Post it Note 3M. If you have small writing, post it notes also come in 2″ wide x 1.5″ high.
You could add the blog post title / idea and leave it at that, but I like to add the workflow tasks as well to see where I’m up to. So if something unexpected pops up and I need a post that’s ready to go (or almost ready to go), rather than the post that was scheduled, I can easily pick one from the page.
I add 4 workflow tasks to my sticky notes:
- Outline
- Photos
- Draft
- Posted
I draw my checkboxes in pen but you could also use the MAMBI self inking checklist stamps if you prefer.
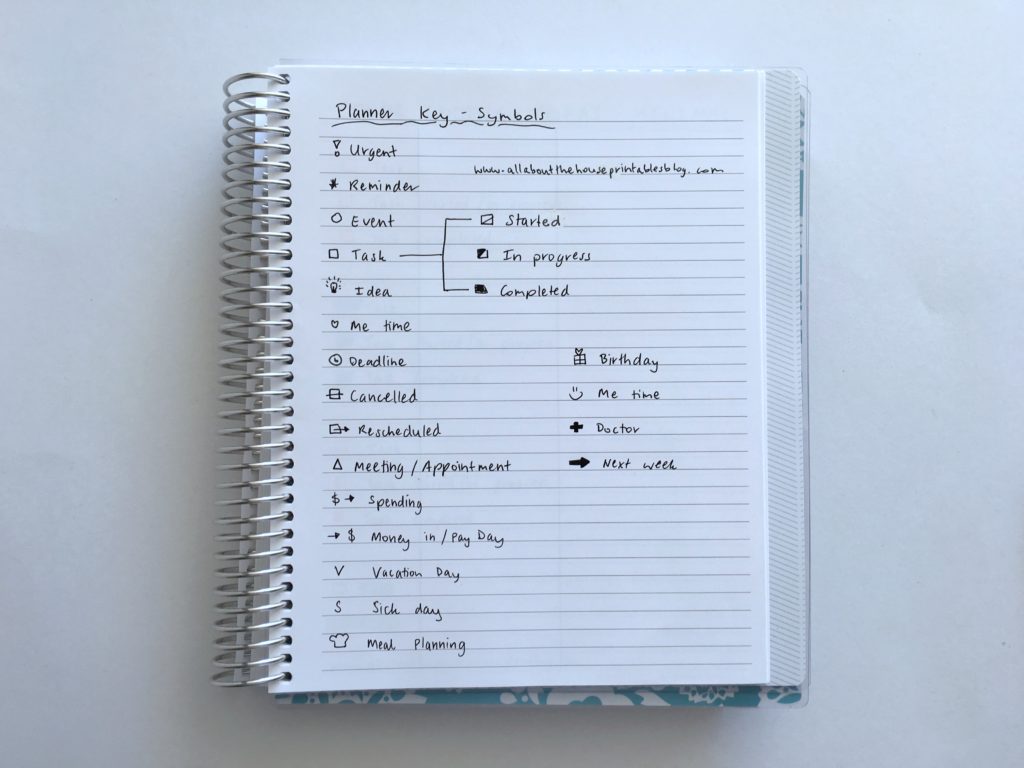
To keep track of where I’m up to this is the system that I use:
- 1 line when the task has been started
- 2 lines when the task has been completed (i.e to create a cross in the box)
If it’s a bigger task (e.g. I’m creating a freebie for the blog), then I do:
- 1 line when the task has been started
- Shaded half box when the task is partly finished
- 2 lines when the task has been completed (i.e to create a cross in the box)
Related: Using a planner key and symbols to code your planner (efficient planning methods)
I write down the date the post was published so I know when I should re-publish it. So if I don’t have any posts prepared but need to post something that day, I can pick one to re-publish.
It’s also a good idea to know when you last posted FAQ type posts. So if you’re getting a lot of questions about the topic it’s probably time to re-post that old post.
Step 5: When the post is published
When the post is published, add the date to the date note, then move it to another page of your planner (I keep it at the back)
The reason I ‘store’ these sticky notes rather than just throwing them out is so that I can re-use them when I want to re-post an old blog post.
By using is so I can pick them up and re-stick them back when I’m planning that week, rather than re-writing everything out on a sticky note again.
I leave enough room on the sticky note that I can write the date the post was re-published so I don’t have to re-write the whole thing again on a fresh sticky note.
![]()
Tips:
- To keep track of what page you’re up to use a bookmark, a colored dot sticker in the top corner of the notebook, or even just a scribble in pen that matches the color
- If you are planing far in advance, apply a color code to each month and then scribble that color at the top of the page for that month’s posts. Then you can move sticky notes here to ‘idea bank’. This is helpful for seasonal content and planning product launches
Why this system works well:
- Sticky notes give you the flexibility to move things around. So rather than having to re-write the post from the initial idea bank, to when it’s scheduled, to keeping track of published posts to refer back to when I want to re-post – I’m only writing it out once, rather than 3 times
- Saves time, you don’t need to color code using pens or stickers etc. and worry about switching out pens, accidentally using the wrong color or running out of stickers
- Sticky notes can be pricey but you get a couple of hundred in a stack so it takes a long time for them to run out. For me, the time saved by not have to re-write things out is worth the cost
You could also use this method for:
- Keeping track of to do’s – with columns for must do, should do, if I have time, do later,
- Tracking routine tasks by time
- Meal planning ideas with separate columns for main meals, chicken etc. before scheduling them into your planner
- Tracking seasonal tasks such as cleaning etc.
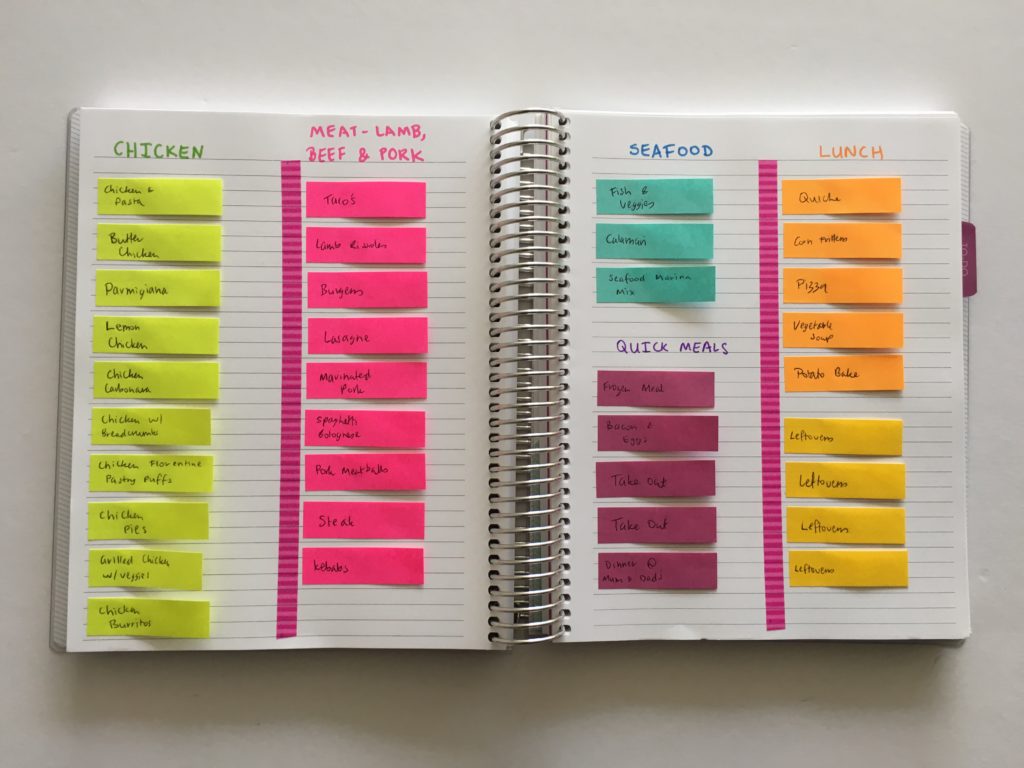
Related: Color coded monthly meal planning using sticky notes
Another option for using sticky notes would be to split the page into 2
Write the workflow tasks on small sticky notes e.g.:
- Make images
- Draft post
- Finalise
And remove the sticky notes from that blog posts’ planning section as you complete them
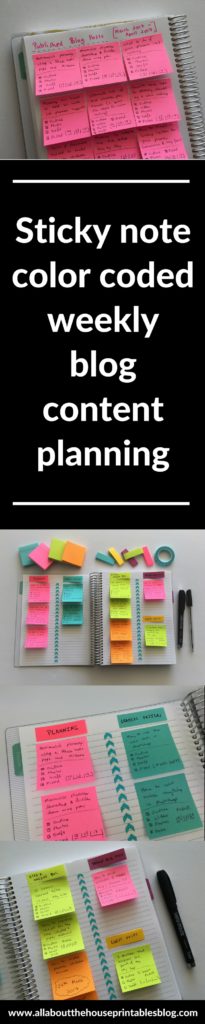
Found this post helpful? Pin it!
Leave a Reply