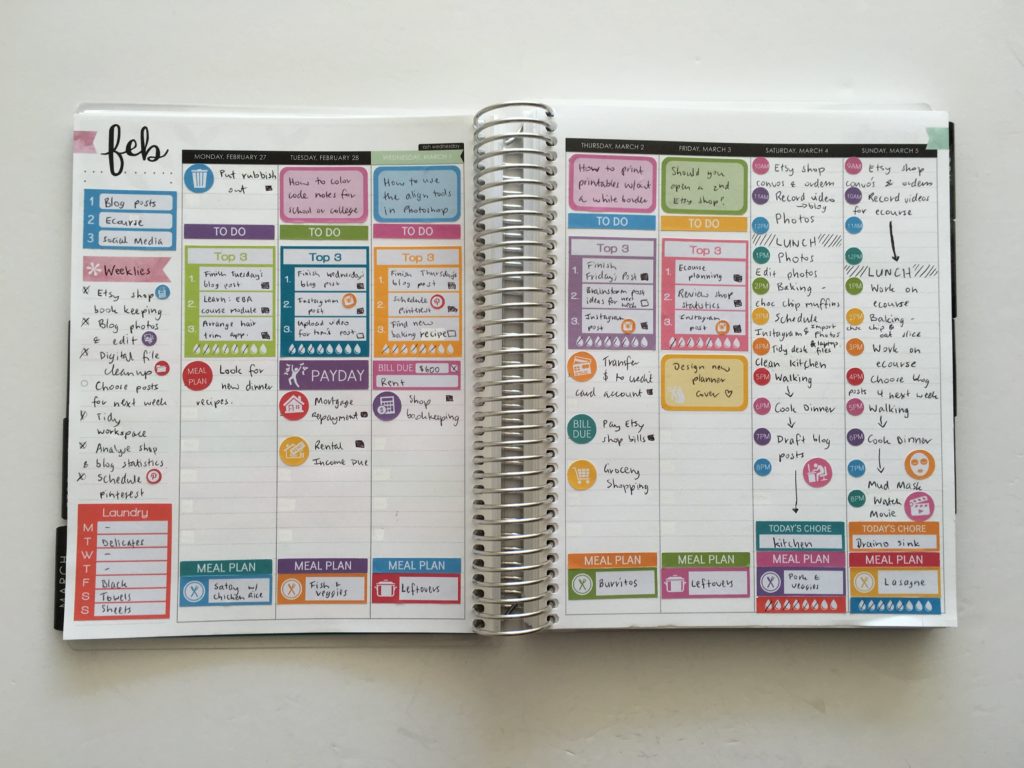
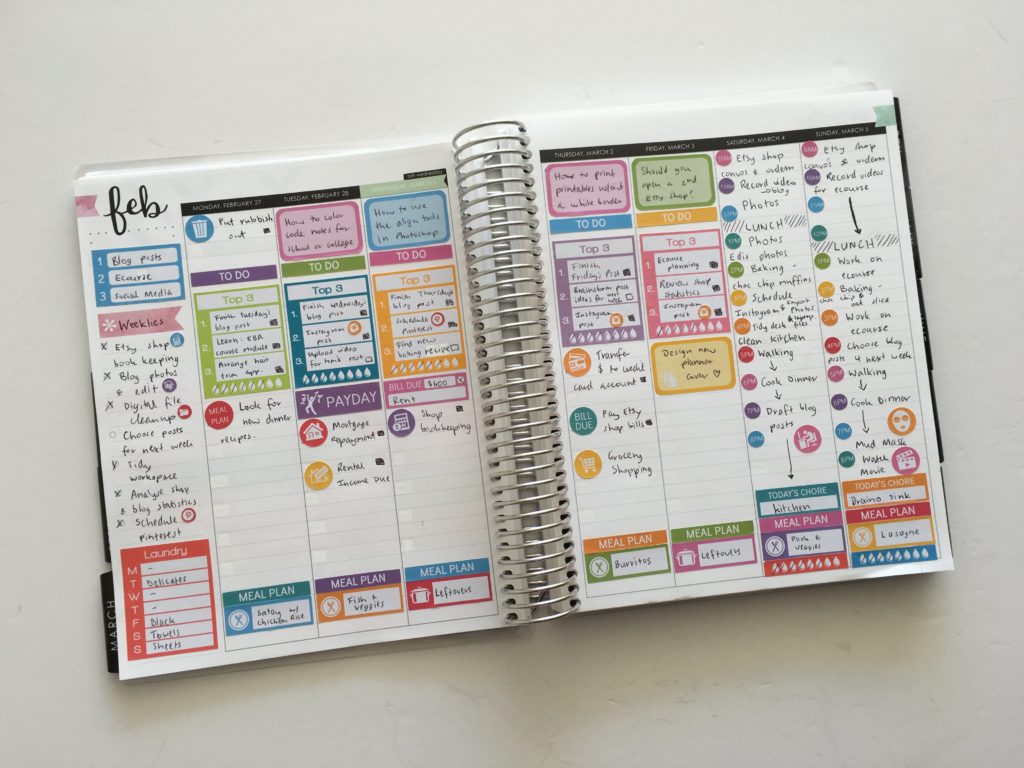
For week 9 of the 52 Planners in 52 Weeks challenge I wanted to try the vertical hourly Erin Condren. But I wanted to customise it by converting the layout into task based planning, rather than time based planning.
o enlarge the screen of the video, click the square icon in the bottom right hand corner of the video (it will say ‘full screen’ when you hover your mouse over the icon).
Subscribe to my YouTube channel for more planner related videos & graphic design tutorials!
Setting up the week
Because I work full time during the week at my day job, I’d lose from 7am to 6pm in the spread for work & commute hours which would take up a lot of space in the spread that could be better utilised for planning the things to get done in the 4 hours each night when I get home. I did want to keep the hourly planning space for Saturday and Sunday though, as this is when I have the most time to work on making products for my Etsy shop and writing blog posts.
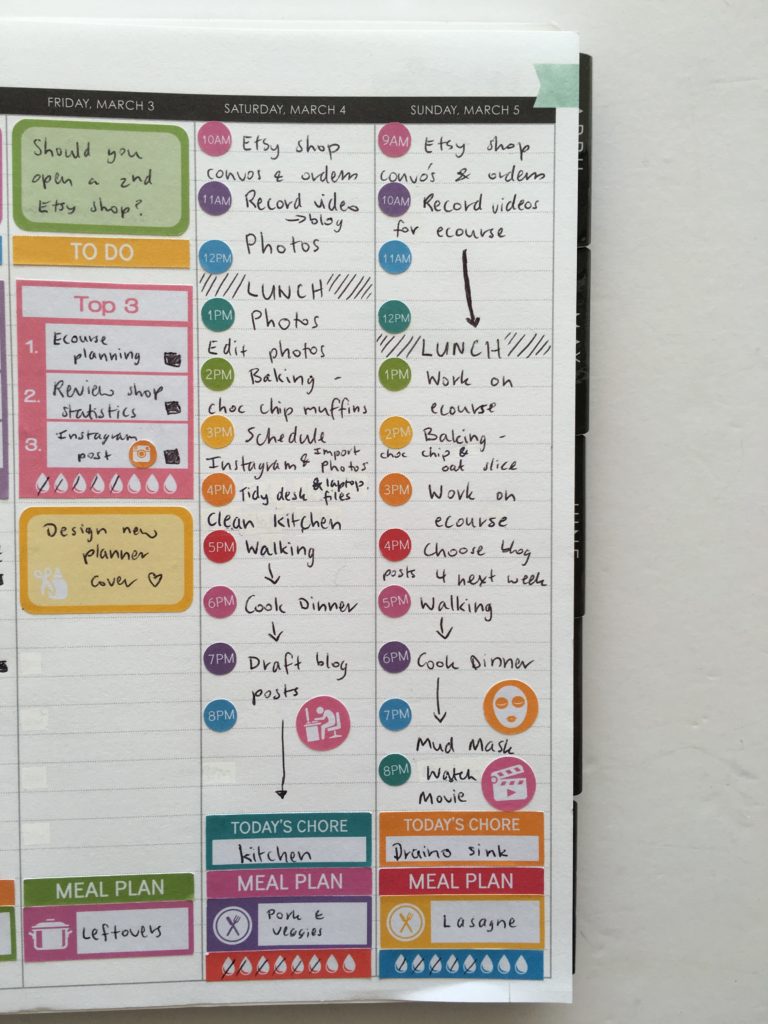
The hourly spread starts at 6am and ends at 7pm. I’m a night owl and at 7pm my night is just beginning! I tend to go to bed at midnight on a weeknight and 1am on a weekend so I made some custom hour dots to cover up the pre-filled hours. I usually don’t roll out of bed until 9am on a Saturday so I started it at 10am and started Sunday at 9am – loved being able customise the start times for each day using stickers without wasting planning space 🙂
I covered up the rest of the time slots using whiteout tape.
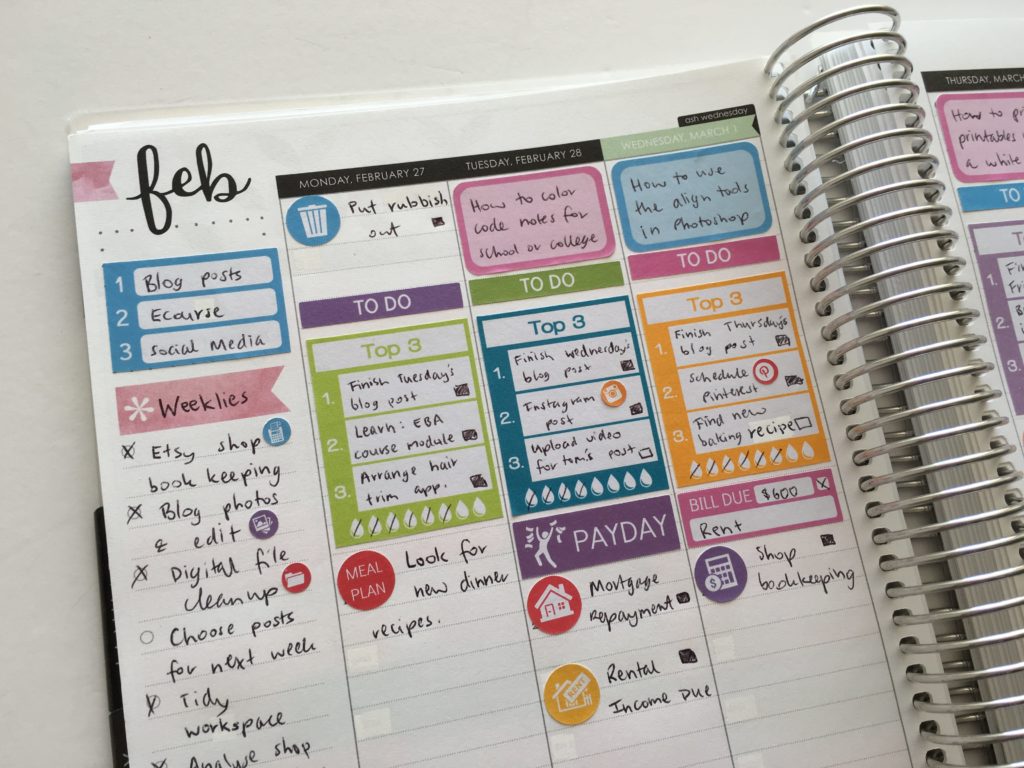
I opted to use used the sidebar for:
- Top 3 focus for the week. My themes this week were blog posts as my number 1 priority (which is usually the case), followed by planning and created content for my ecourse which I’ve since released: How to make planner stickers followed by social media (which I’m guilty of often abandoning). The sticker I used is half the size of one of the 3 planning boxes per day in the Erin Condren vertical life planner.
- Next I added my weekly routine tasks for the blog and my Etsy shop
- Followed by my plan of when to do laundry. I don’t use a dryer (too expensive!) and because I live in an apartment clothes line space is limited. I always forget to put a load or 2 on during the week so made these laundry stickers to remind me. The sticker I used is the size of one of the 3 planning boxes per day in the Erin Condren vertical life planner.
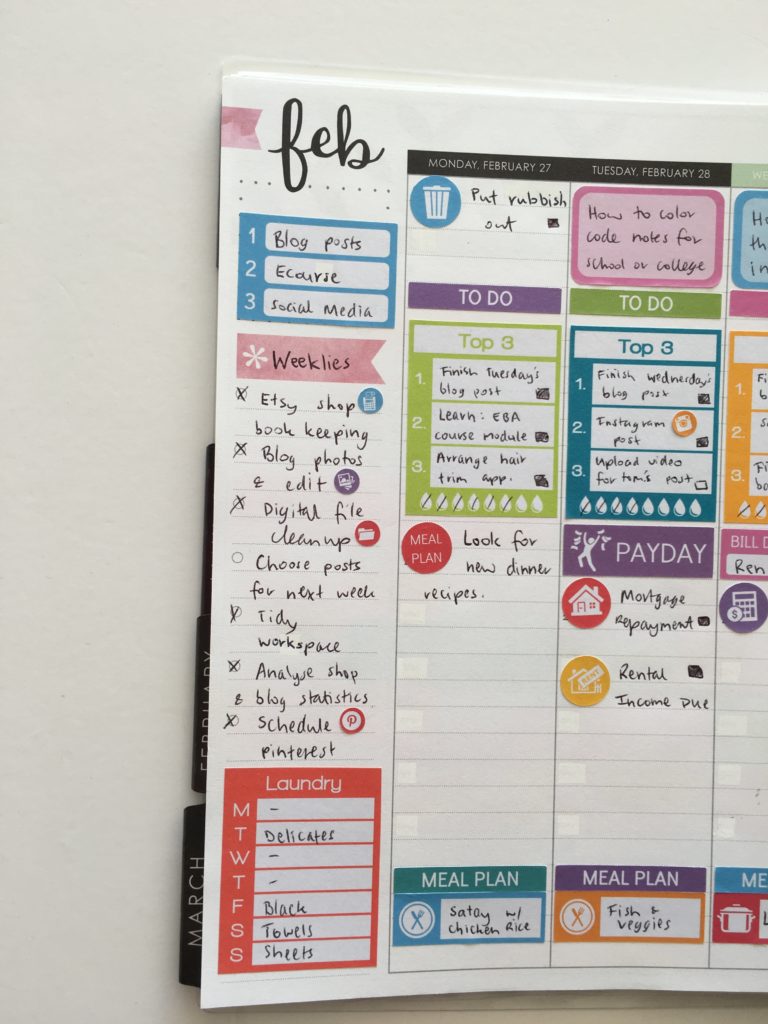
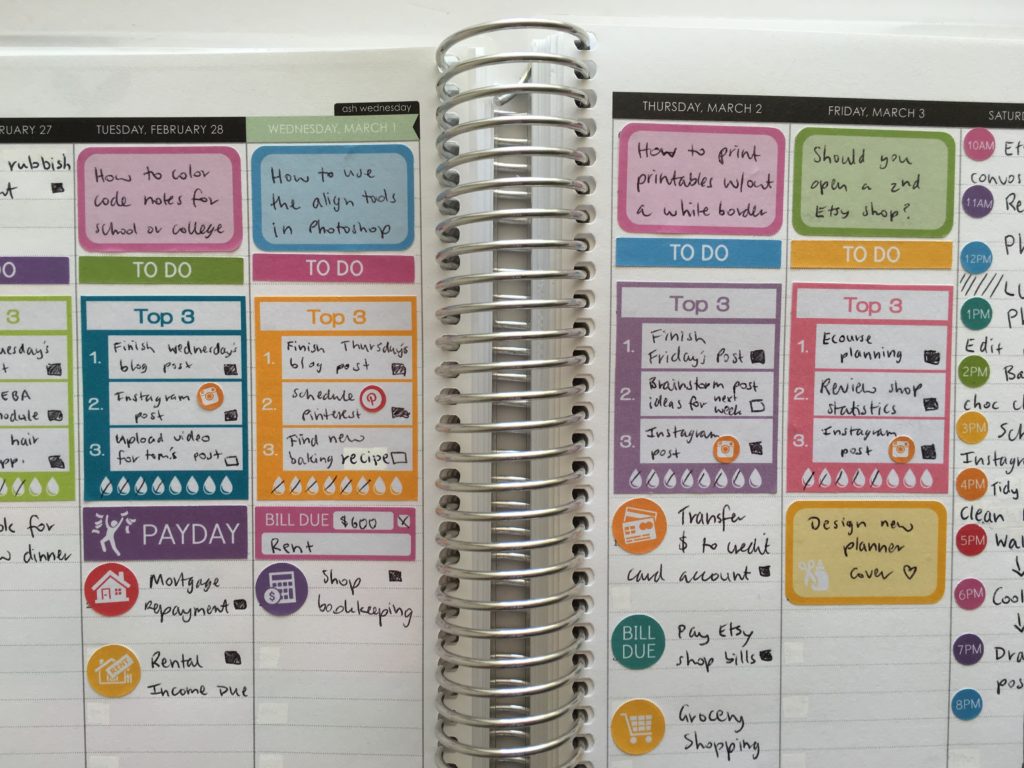
I used half box stickers for planning what blog posts I was going to publish when:
- Pink = planners
- Blue = Graphic design tutorials
- Green = running an online business & blogging
And used a top 3 sticker for each day. I’m prone to over-scheduling so made these stickers to ‘limit myself’
I thought about color coding everything from the stickers to pens as well and using stickers in hours that corresponded when I was going to be working on what type of task (e.g. one color for blog, another for Etsy stuff and another for personal etc.) – but that takes a lot of time and effort to coordinate all that and find stickers with the icon that I wanted to use in the corresponding color. I didn’t want to spend 30 minutes just planning how I was going to stick stickers in my planner. So I decided to just to a pretty rainbow theme for the hourly dots. This then lead me to trying a week without color coding my planner as I normally do (apart from the blog posts).
Related: Planner Organization: How to color-code your planner (so you’ll actually use it effectively)
‘Mistakes’ made in this week’s spread
- I didn’t really think out how I was going to use the spread much before I started sticking stickers. While I’m happy with how it turned out, I do think weekly spreads turn out better when I do a quick sketch on a piece of scrap paper of how I’m going to use the spread before I start ploughing ahead sticking stickers
- I forgot to use title / header stickers for blogging and personal which I think would’ve made the spread look neater – never mind!
- I do prefer color coding but the top 3 stickers actually worked really well at keeping me on track
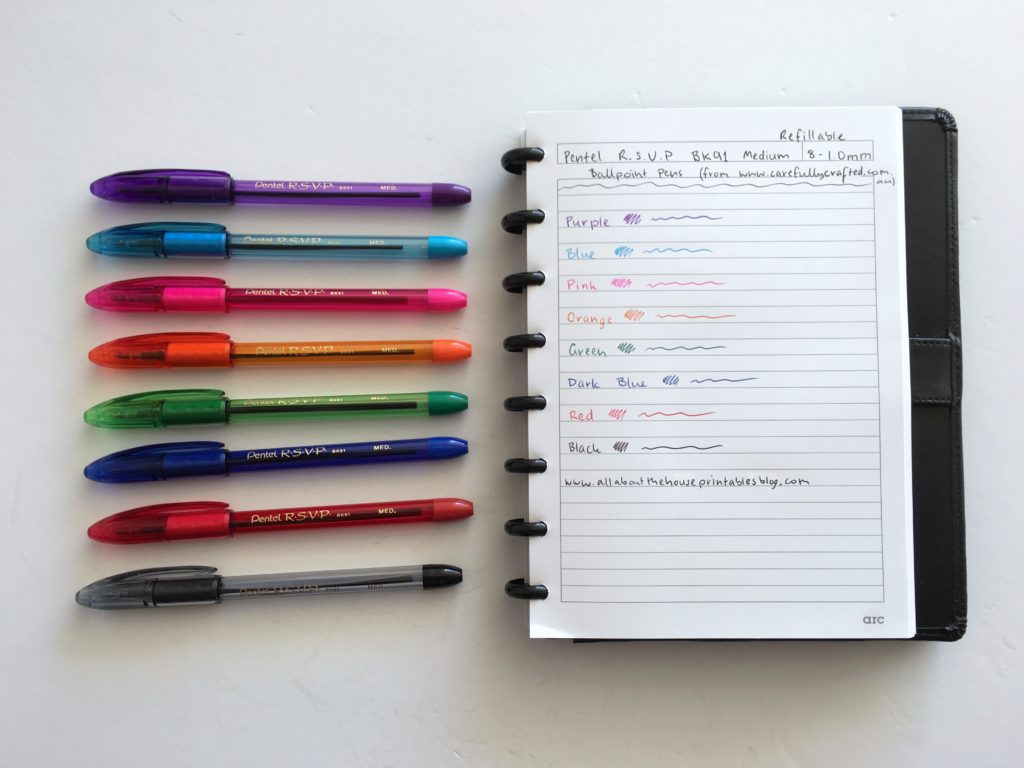
Pens Used
I used the a recent addition to my pen collection: the Pentel RSVP BK91 Medium tip. Really love these pens and wish they came in more colors!
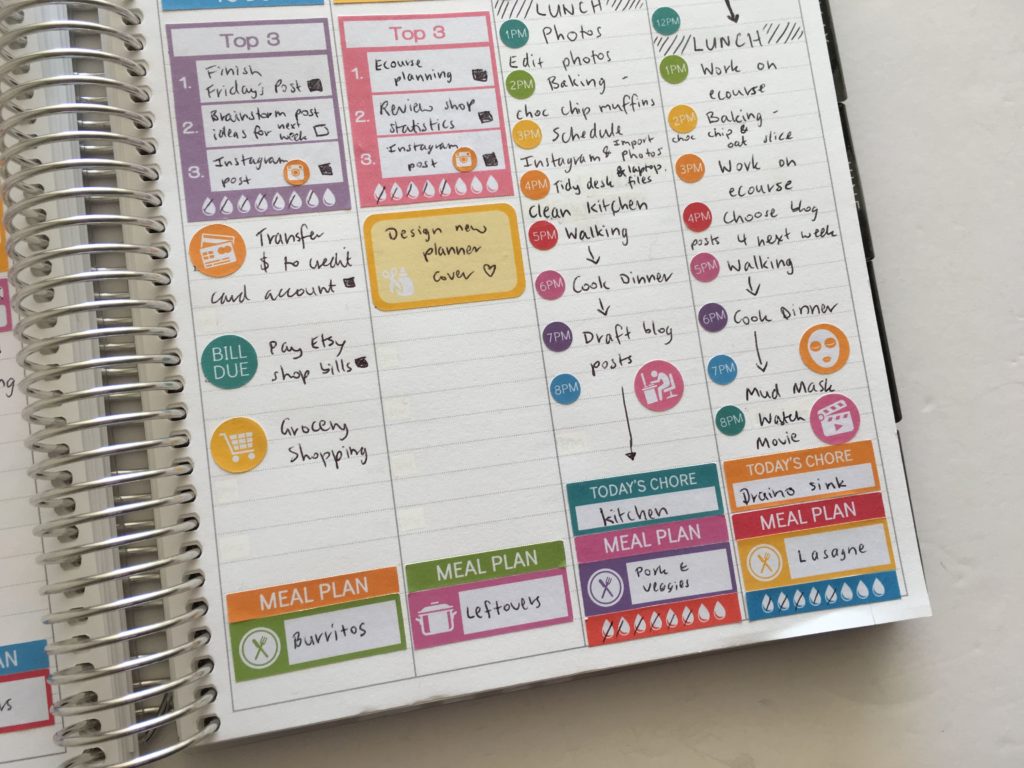
Stickers
The stickers in this week’s spread were designed by me and can be found in my sisters Etsy shop: Carefully Crafted. I have an ecourse if you want to learn how to make your own planner stickers.
- For the meal planning stickers, I used 2 icons: the crockpot icon for leftovers and the dinner plate with knife and fork for nights I was cooking
- I cut the hydrate tracking off the bottom of 2 of these stickers to get the hydrate for Saturday and Sunday as I didn’t need the top 3 section since those days were planned by the hour
I thought about color coding by day and doing Monday in 1 color, Tuesday in another color etc. But since I tend to do categorised planning (and while this would’ve looked really pretty!) I opted not to confuse myself by doing this. I was intending to color code with stickers, but in the end I just color coded the blog posts then just picked whatever color in the stickers I was using to create a rainbow theme.
Related: Which planner stickers are right for you?
Pros of this week’s spread
- Writing in black pen was certainly quicker than switching pen colors all the time – I do think I prefer the look of colored pens though. If you’re on the hunt for a decent black planner pen (a staple for every planner addict!) I did a roundup here: Favorite black pens for planner addicts
- Because my time to spend working on the blog and me Etsy shop is limited I made some top 3 stickers for each day – these are full box EC size but worked well in the hourly as well. While I love color coding, minimizing how much to do each day by using the top 3 sticker and actually being realistic about how much I could get done in a day meant that I didn’t really ‘miss’ color coding my planner this week. As someone who color codes their planner practically every week this was a big thing for me!
- Daily hydrate stickers are always effective at reminding me to drink more water. Since I had plenty of space in this style of layout I’m glad I saved space and didn’t put hydrate tracking in the sidebar like I usually do
- Liked that the bill stickers were placed on the daily view, rather than in the sidebar – I placed these 2 – 3 days before the bills were actually due to remind me to pay them and allow enough time for the bank transfer to go through – would definitely do this again
- As for the Erin Condren hourly planner – I liked it more than I thought I would. One of the reasons I swore off using the vertical Erin Condren Life Planner was the restrictive 3 sections per day. Sometimes I’d need more space for 1 category and less for another and found it a bit inflexible. I like that I could convert the hourly spread into a big list for each day’s to do’s and cover up the hours to make the planner work for me. You could customise each day with header stickers to create 2, 3, 4 or 5 sections. The lines are dashed in the planner so it’s not a ‘busy’ layout. I think any size sticker could work in an hourly layout – half box, full box, icons, quarter box size, header stickers etc.
Related: How to make a DIY Erin Condren Planner Cover for less than $2 (plus free printable cover)
Cons
- Space was a bit tight for the weekend with the hourly sticker – there wasn’t much room to write tasks for each hour and there wasn’t any room for my beloved checkboxes 🙁
- More space than I needed for the days of the week so there was a bit of dead space – although this did help avoid the spread bieng ‘cluttered’
- The laundry sticker in the sidebar was a good idea but it did take up a fair bit of room. I think an icon sticker on the days a load of washing needs to be done would be a more space efficient way to plan
Would I use this planner again?
I liked planning in the EC hourly more than I thought I would. However the columns are not quite wide enough for my writing and still be able to have enough room to draw a checkbox.
A fair bit of customisation was required to alter this layout to suit my task focused planning style. If I was to use this each week it would take a bit of time to set up. I can see how this planner is ideal for someone that needs to stay on track by scheduling everything out to get done, in order for it to get done, but it’s not an ideal long term solution for me. If I did blogging and ran my Etsy shop full time, then I think this planner layout could be really helpful with keeping me productive.
I’ve thought about making a printable planner layout with the full length of the page for Saturday and Sunday, but shorter columns for Monday to Friday and then space for routine / weekly habits in a grid (like this layout I made a few years ago) underneath the days of the week. I think this would be a more efficient use of space. Maybe I’ll do that layout for one of the future weeks of the challenge!
Catch up on past weeks of the challenge:
- Week 1: Using a daily habit/routine tracker to plan your week
- Week 2: Planning using daily checklists
- Week 3: Plum Paper Vertical Planner – Better than the Erin Condren?
- Week 4: Minimalist planning: how to plan your week using a blank notes page and stickers
- Week 5: Planning by category and task, rather than by day
- Week 6: Planning using the Horizontal Erin Condren Life Planner
- Week 7: Pros and cons of using a 1 Page Weekly Planner
- Week 8: Weekly Planning using the Plum Paper Memory Keeper Book (52 Planners in 52 Weeks: Week 8)
Leave a Reply